
 User manual
Migasender user manual
Everything you need to connect your WhatsApp numbers, answer customers, send campaigns and keep an eye on usage and delivery.
Nothing found. Try a shorter term, or clear the search with Esc.
Chapter 1
Welcome to Migasender
What it is, what it does, and the vocabulary used throughout this manual.
Migasender connects your company's WhatsApp numbers to a single dashboard. From there you can answer conversations, send campaigns to lists of contacts, let an AI assistant reply when nobody is available, and check how many messages were delivered and read.
Words that keep coming up
| Term | What it means |
|---|---|
| Line | A WhatsApp number connected to the dashboard. You can have more than one. |
| Instance | The technical session that keeps a number connected. Each line has up to two. |
| Primary / Master | The main connection. Messages are sent through this one. |
| Backup / Slave | The standby connection. If the primary drops, sending moves here on its own. |
| QR code | The code you scan with WhatsApp on your phone to connect the number. |
| Template | A message pre-approved by Meta. You need one to message a customer first. |
| Cloud API / WABA | Meta's official channel. Migasender uses it as a fallback when needed. |
| Broadcast | One message sent to many contacts at once. |
| Roundbin | A pool of lines that messages are distributed across in turn. |
| Anti-ban | The guards that slow sending down so the number does not get blocked. |
Every screenshot in this manual uses sample data. The numbers, names and addresses do not belong to real people.
Chapter 2
Signing in
Getting into the dashboard, and recovering your password.
How to sign in
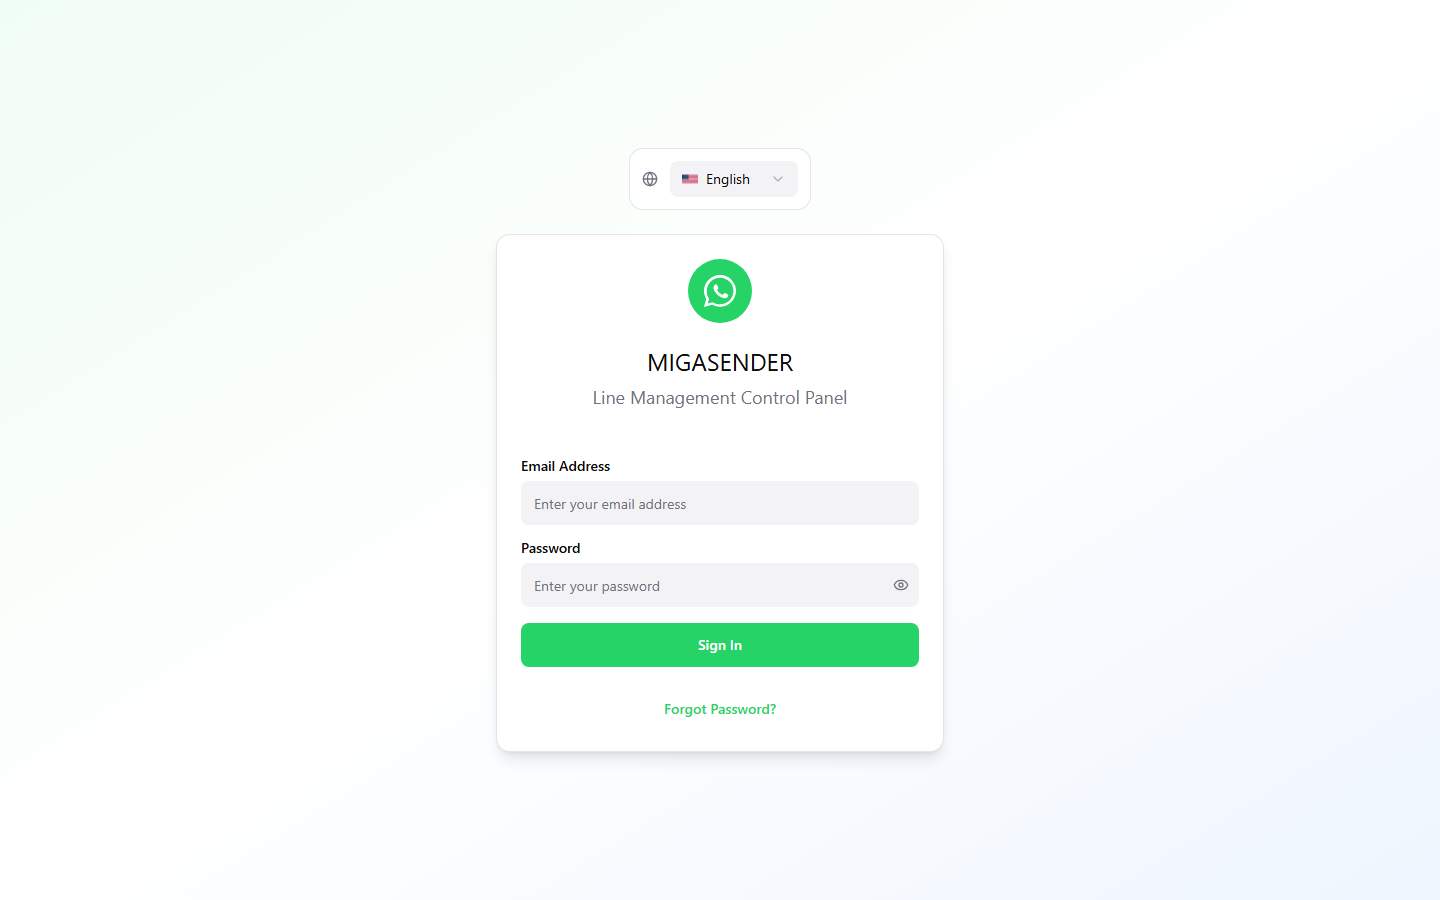
- Open
https://dashboard.migasender.com. It is the same address for everyone, whichever platform your account belongs to. - Type your email address and password.
- Press Sign In.
- If you have one app, it opens straight away. If you have more than one, a window appears so you can pick which one to work on.
If your email has accounts on more than one platform, after signing in you see the apps of all of them together.
Old bookmarks with /p/… in the address still work; there is no need to change them.
After 10 wrong passwords in 15 minutes sign-in is blocked for 15 minutes. Wait, then try again (or reset the password below).
Once an app is open, the address in the browser becomes https://dashboard.migasender.com/p/ followed by a long code: that code is your platform's registration token (see below). You can switch app at any time with Change App at the top left.
Forgotten password
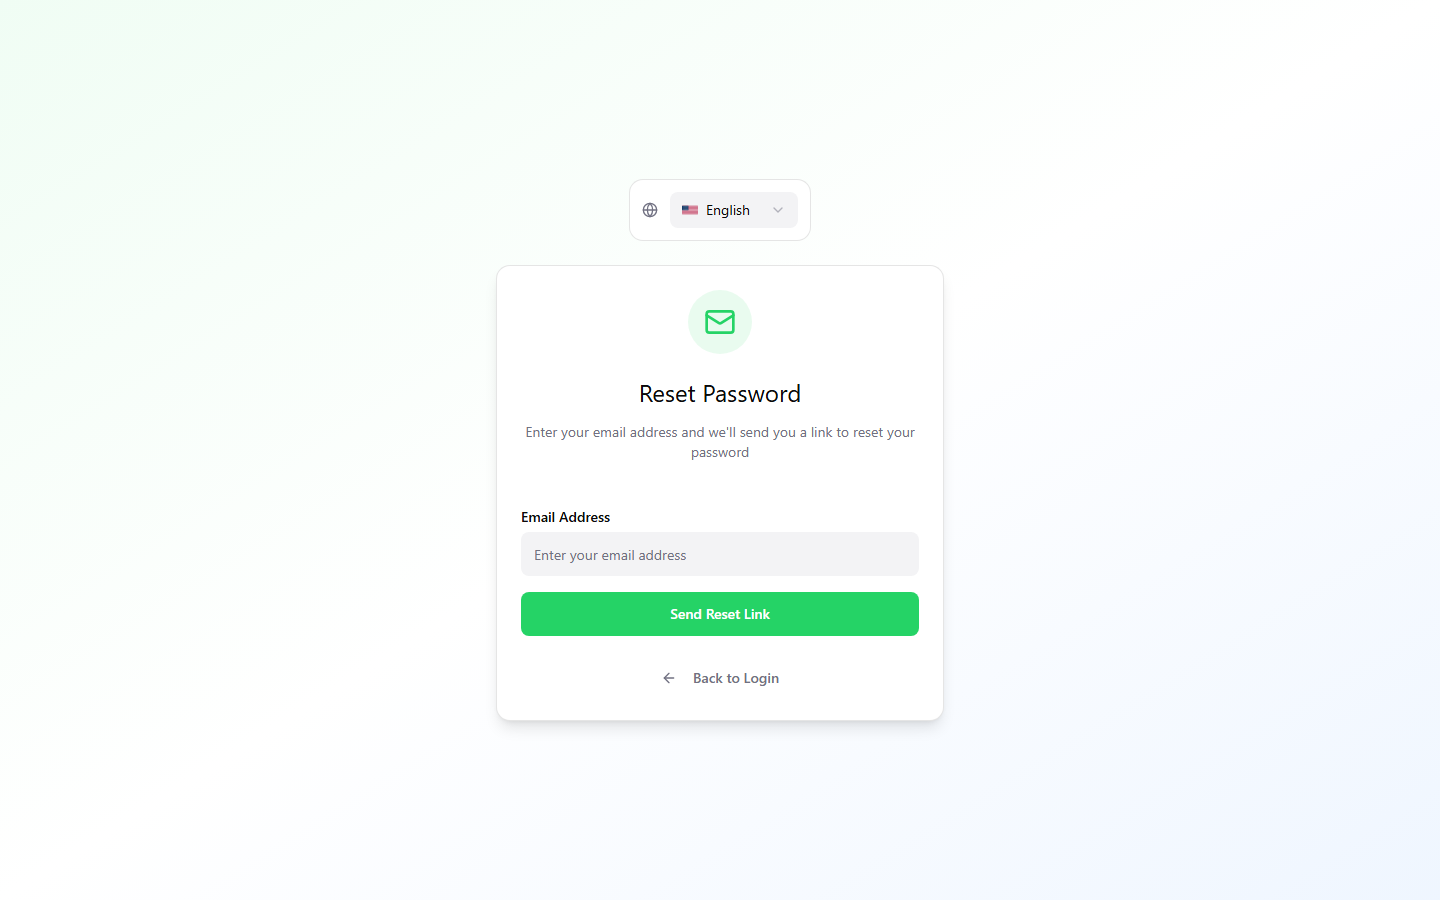
- Open
https://dashboard.migasender.comand press Forgot Password?. - Enter the email you sign in with and press Send Reset Link.
- Open the message you receive and follow the link.
- Type the new password twice (at least 8 characters) and press Save New Password. You are taken back to the sign-in screen.
The link goes to the address you typed, not to a company mailbox. It is valid for 1 hour and works once; if it has expired, simply ask for a new one. If your email has accounts on more than one platform, the new password applies to all of them. If it has not arrived within a few minutes, check your spam folder.
If the screen says password reset by email is not available on this platform, the platform has no outgoing email configured yet. Contact support and they will reset it for you.
Your platform registration token
The registration token is the long code after /p/ in your addresses. It identifies your platform and is required in every API call, which always starts with https://apidb.migasender.com/p/<registration token>/ (see the API reference). You can find it in three places:
| Where | How to find it |
|---|---|
| Your dashboard address | Look at the browser's address bar while you are signed in: the token is everything after /p/. In https://dashboard.migasender.com/p/907a0888…c1f61b the token is 907a0888…c1f61b. |
| The old (Siberian) backoffice |
|
| The Migasender admin panel | For platform administrators only: sign in at https://apidb.migasender.com/panel/, open Platforms and read the Registration Token column next to your platform. |
Keep the token private: together with your security token it lets someone call the API for your platform. If it has been shared by mistake, a platform administrator can issue a new one from the admin panel; your addresses and integrations must then be updated to the new code.
Your platform token (Line, QR, Instances and Groups APIs)
The platform token must be requested from your platform administrator. It is not shown in the customer dashboard or in the API endpoints panel.
The platform token is a separate 64-character code, different from the registration token. The Line Management, QR Code, Instances / Line Log and Groups APIs need it in the request body: as platform_token for api_qr/*, api_linelog/* and Groups, and as security_token for api_line/* and api_instances/*. All other parameters work exactly as on the legacy API; the only new part is the /p/<registration token>/ prefix in the address.
The platform token is not shown in the customer dashboard. Ask your platform administrator for it. Administrators find it in two places, and it is the same token in both:
| Where | How to find it |
|---|---|
| The old (Siberian) backoffice | Manage → Modules → Migawhatsapp, box Platform Token for API. |
| The Migasender admin panel | Sign in at https://apidb.migasender.com/panel/ → Settings → Platform Token for API. |
Sending the registration token or the Send Message token here fails with Platform token mismatched. or Security token mismatched. The platform token gives access to every app and line on the platform: keep it private. If it is regenerated in the admin panel, the old one stops working immediately and every integration must be updated.
Chapter 3
How the interface is laid out
The left menu, the top bar, the theme, and using it on a phone.
The left menu
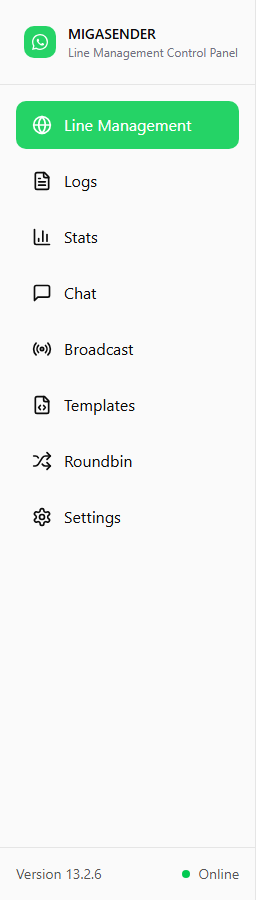
| Item | What it is for |
|---|---|
| Line Management | Connect numbers and check their status. |
| Logs | A detailed record of every message in and out. |
| Stats | Delivery and read figures, plus voice and AI usage. |
| Chat | Reply to live conversations. |
| Broadcast | Phonebook, groups, list sends and their history. |
| Templates | Messages pre-approved by Meta, and WABA configuration. |
| Roundbin | Spread sending across several lines in turn. |
| Settings | Credentials, alerts, webhooks and API access. |
At the bottom of the menu you will find the dashboard version and an Online indicator confirming the connection to the server.
The top bar

- Change App — switch between companies, if you manage more than one.
- Messages Left — how many messages you can still send this month.
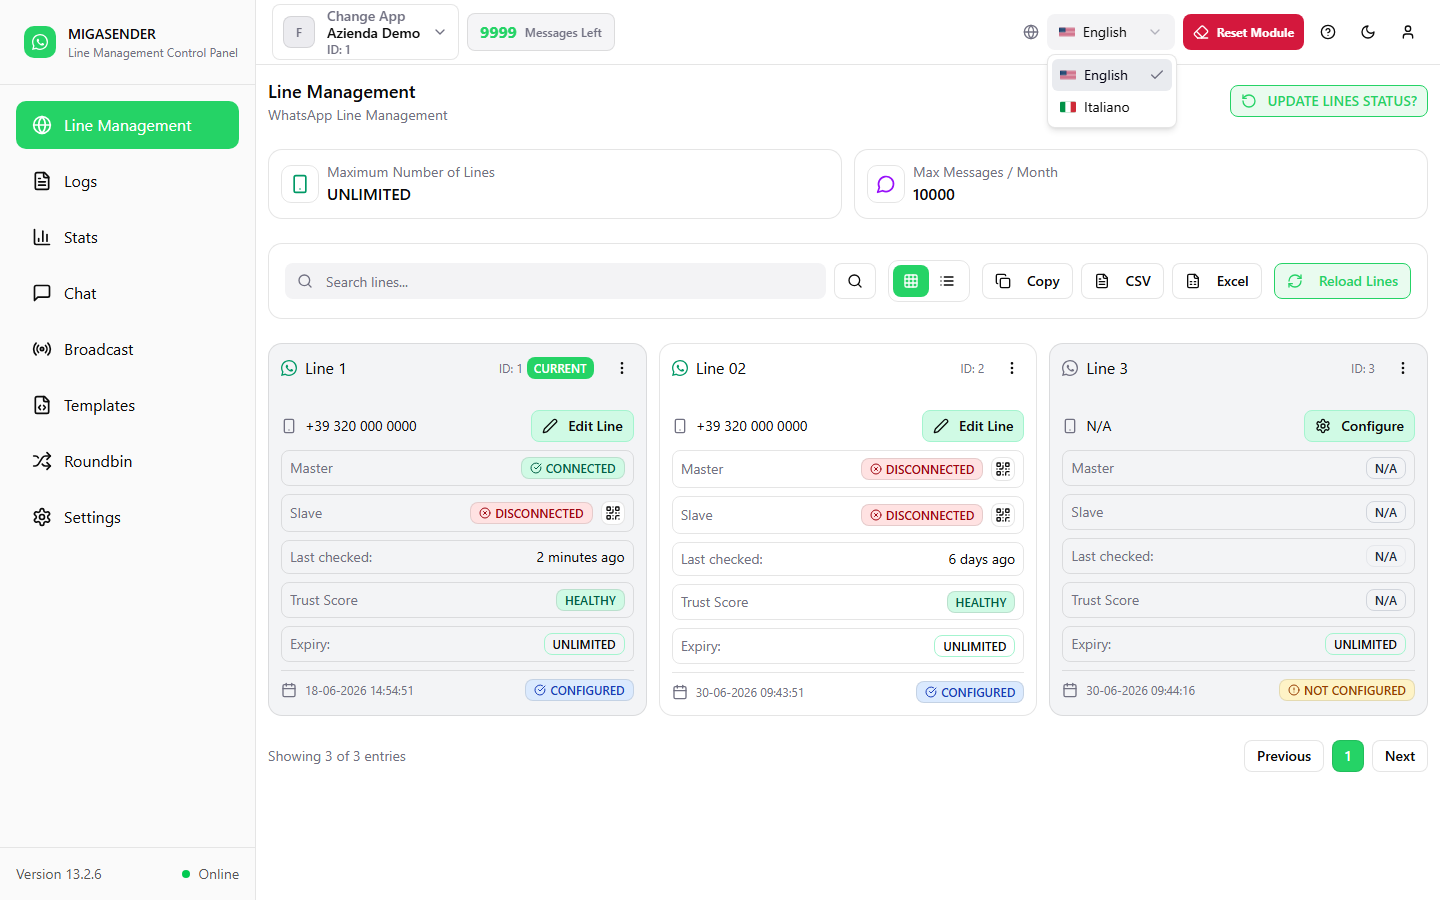
- Language — English or Italian; your choice is remembered.
- Reset Module — returns the configuration to its initial state. Only use it if support asks you to.
- Support — the question-mark icon opens the frequently asked questions in another browser tab.
- Theme — switch between light and dark.
- Account — sign out.
Reset Module clears the module's configuration. It is not a page refresh: only use it when support explicitly asks you to.
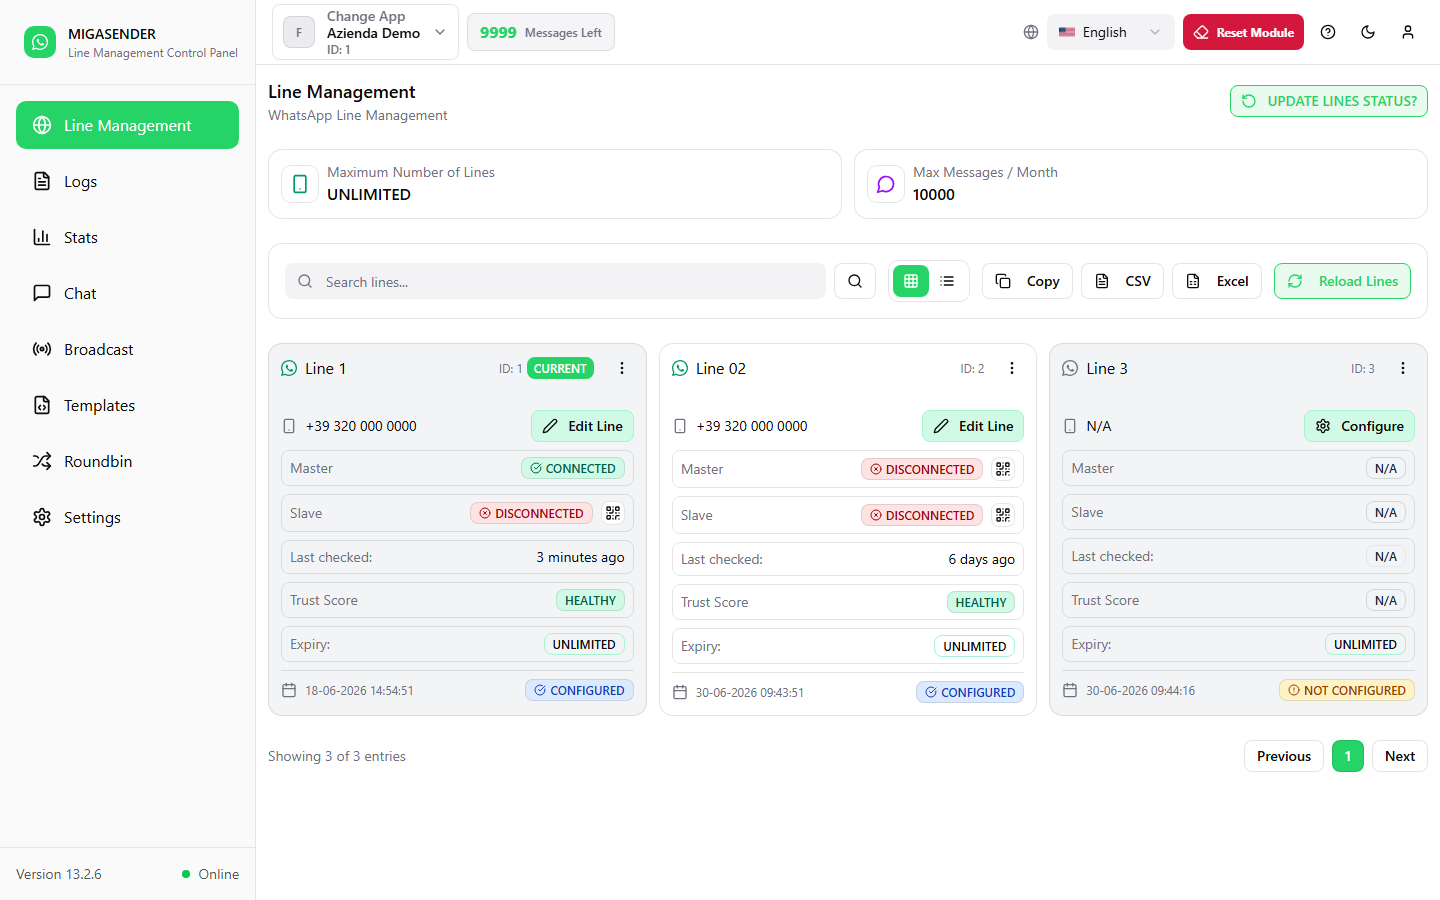
Language and theme
On a phone
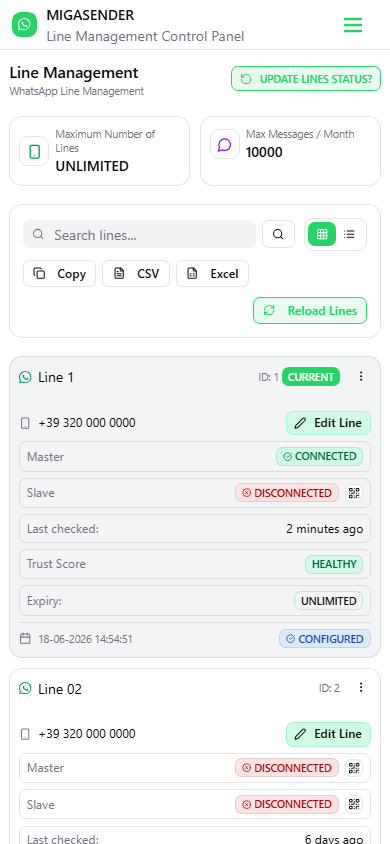
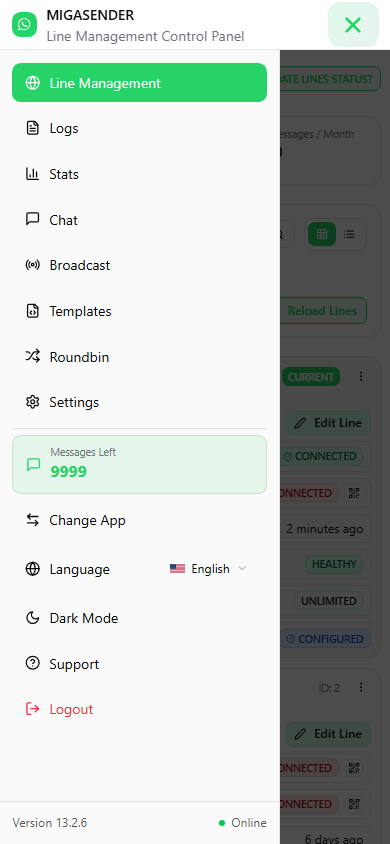
The side menu turns into a drawer, opened with the three-line icon at the top left.
Chapter 4
Line Management
The page that tells you at a glance whether your numbers are live.
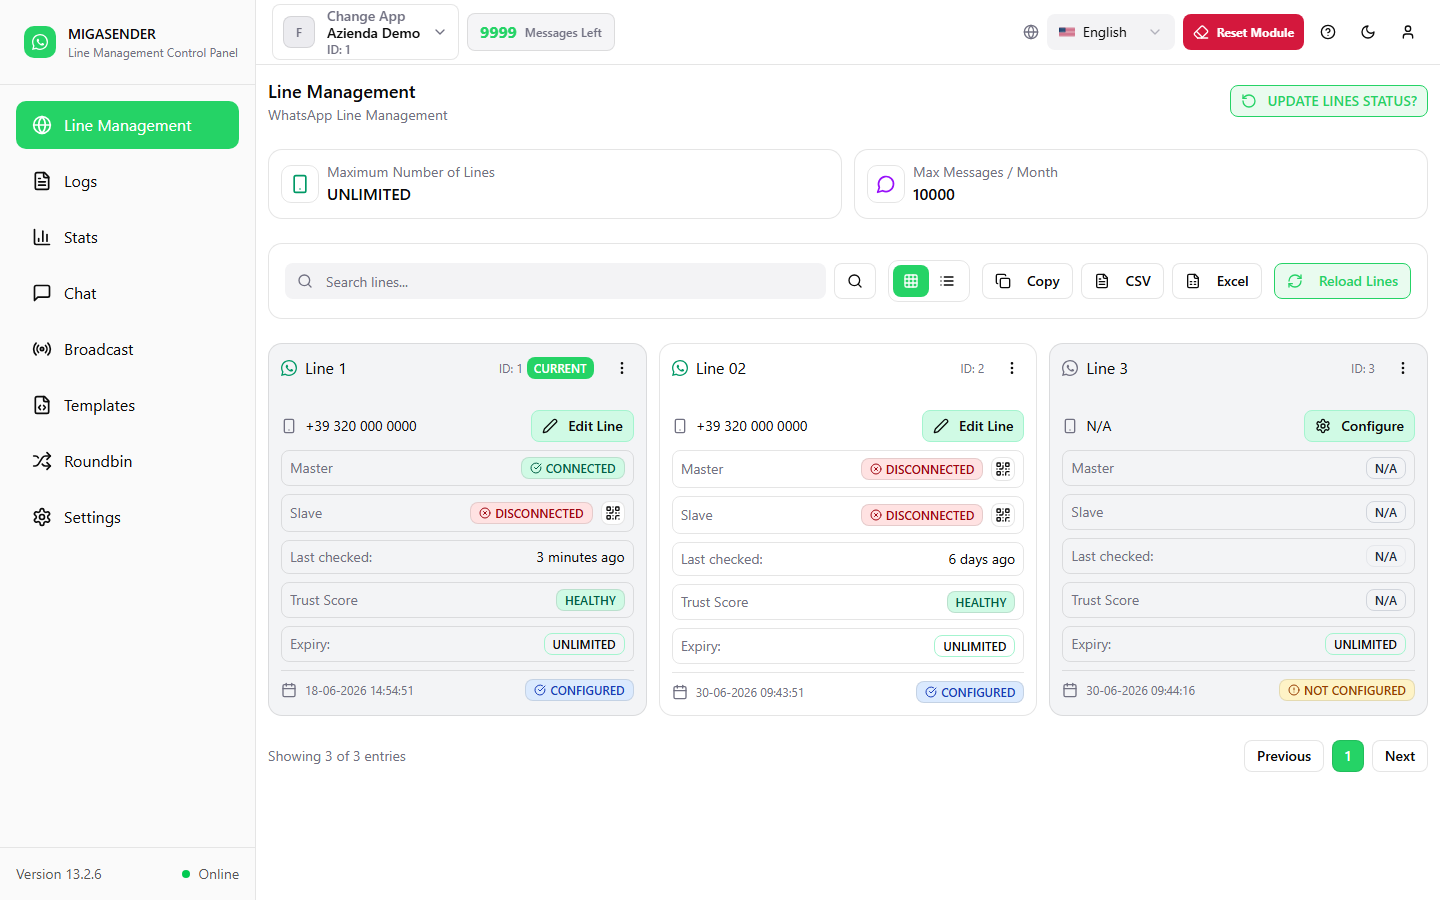
The two cards on top
- Maximum Number of Lines — how many lines your plan allows.
- Max Messages / Month — your monthly message ceiling.
A line's card

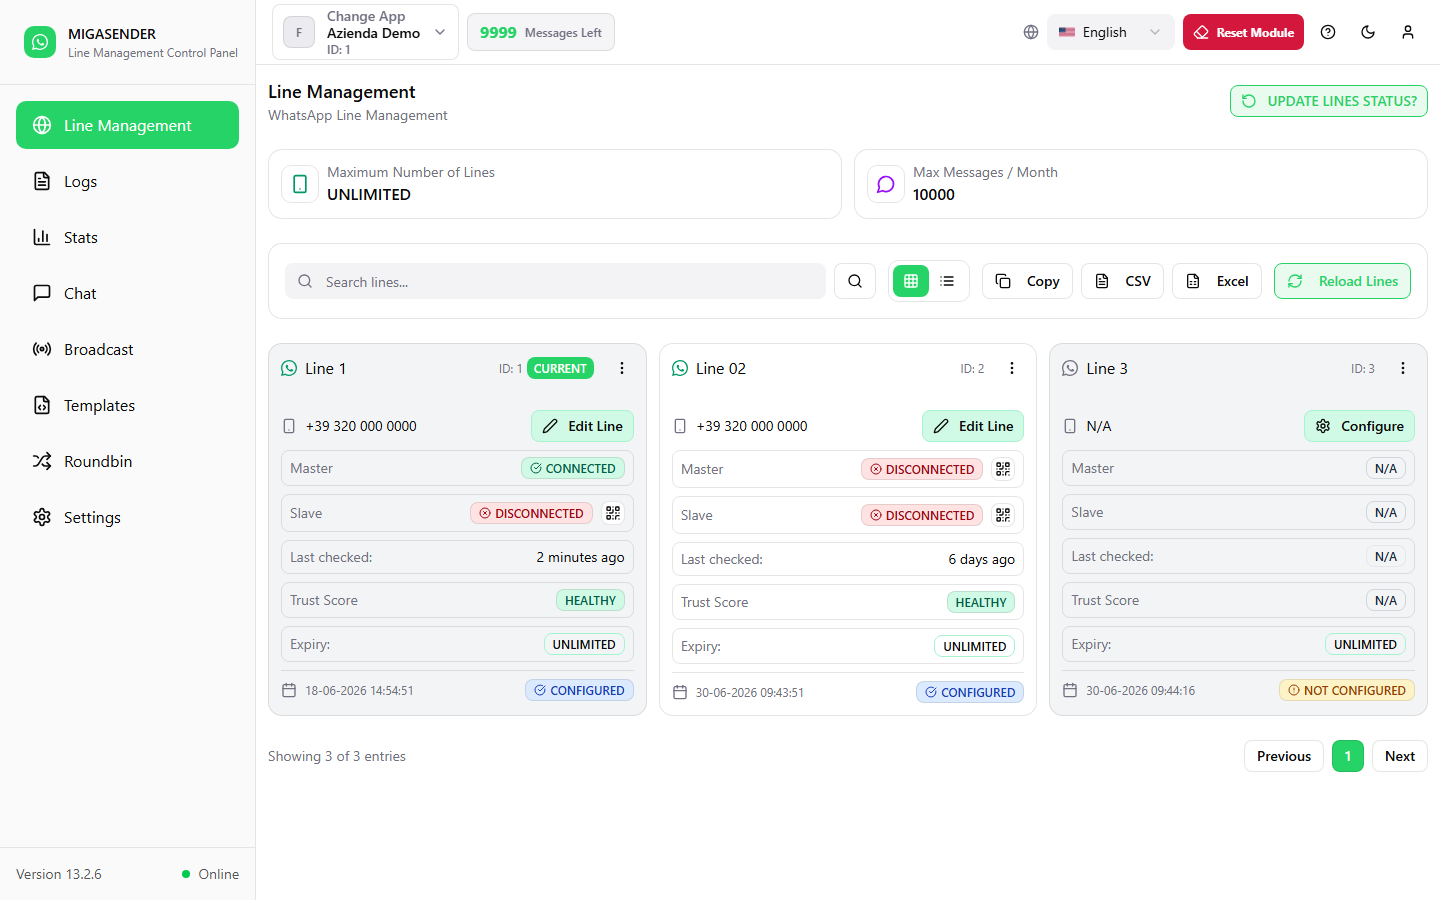
- Name and ID — what you called the line and its identifier. CURRENT marks the line used by default.
- Number — the connected WhatsApp number.
- Edit Line — opens the configuration (chapters 5 and 6). If the line is not ready yet the button reads Configure.
- Master and Slave — the state of the two connections.
- Last checked — when the dashboard last verified the status.
- Trust Score — a health indicator for the number.
- Expiry — how long the line stays active.
- Configuration state — CONFIGURED or NOT CONFIGURED.
What the statuses mean
| Status | Meaning | What to do |
|---|---|---|
| CONNECTED | The number is live and can send and receive. | Nothing. |
| STARTING | The session is coming up. | Wait a few seconds and refresh. |
| SCAN QR | A QR code needs scanning. | See chapter 5. |
| DISCONNECTED | The session has dropped. | Reconnect the number with a fresh QR. |
| N/A | The line has not been configured yet. | Press Configure. |
The actions menu
The three-dot icon at the top right of each card opens the actions available for that line.
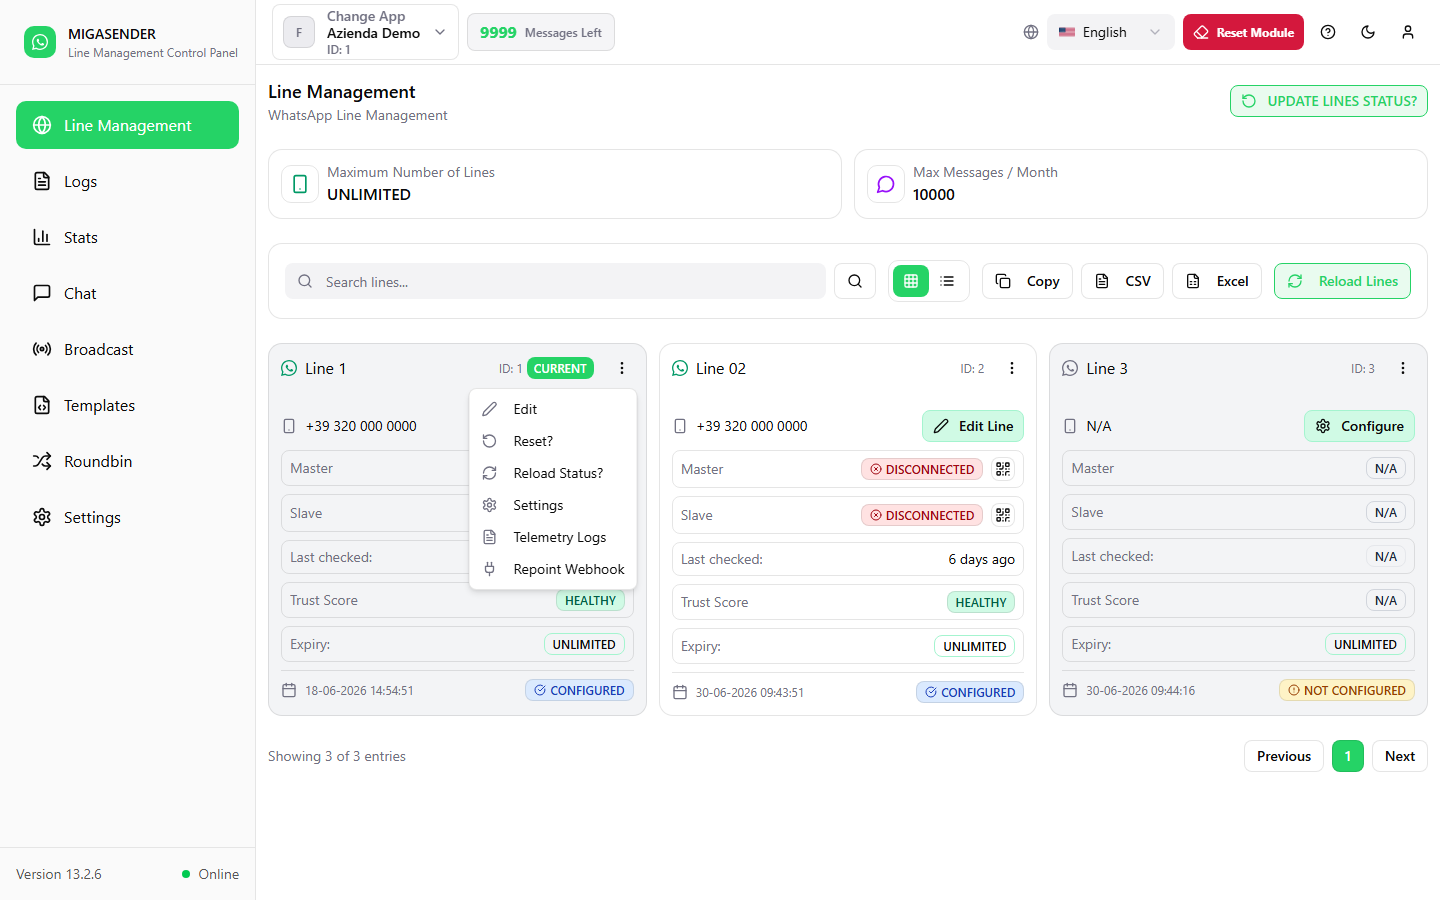
| Action | What it does |
|---|---|
| Edit | Opens the line's setup, the same as the Edit Line button. |
| Reset? | Restarts the line's session. |
| Reload Status? | Asks the server for this one line's current state. |
| Settings | Goes straight to step 3 of the setup, the settings step. |
| Telemetry Logs | Shows the line's technical events (see below). |
| Repoint Webhook | Points this line's WhatsApp session webhook back at this server. |
Reset? drops the session: for a moment the line neither sends nor receives. Use it when a line is stuck, not as a first attempt.
Repoint Webhook is for when incoming messages stop appearing because the line is still sending its events to an old address. It does not touch the WhatsApp connection.
Telemetry Logs
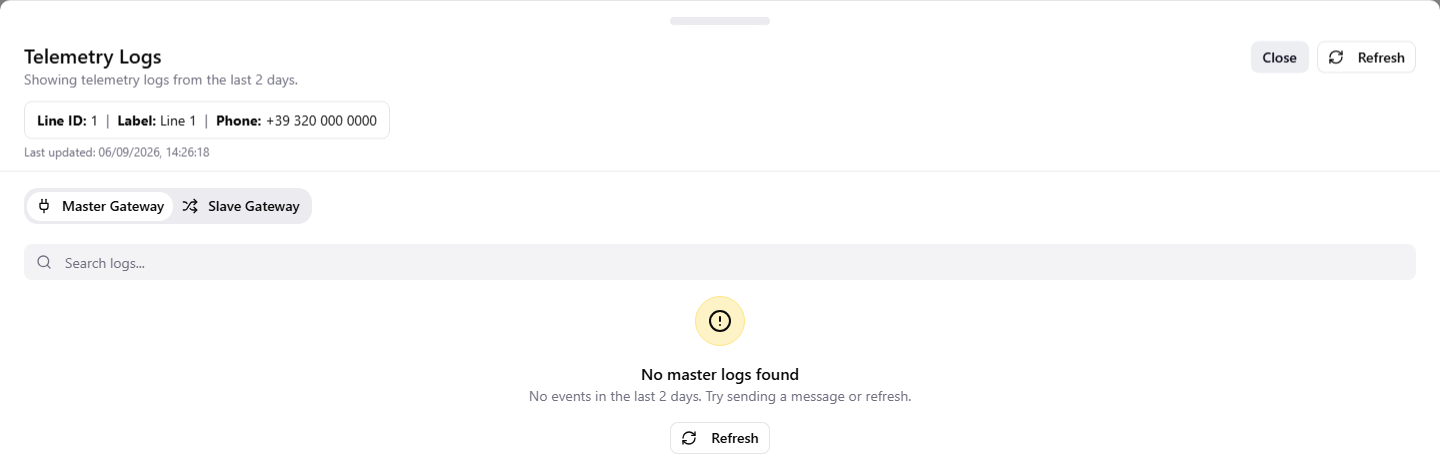
Telemetry lists the technical events exchanged between the line and the server over the last 2 days, split into two tabs: Master Gateway and Slave Gateway. The header repeats which line you are looking at and when the view was last updated, and the box below searches the entries.
When there are events, each one is listed with its outcome — success or error — its date and time, and the raw content the server received. An empty panel is not a fault: it simply means nothing has passed through that gateway in the window.
This is the place to look when a line behaves oddly but the message Logs show nothing: here you can see whether the server is receiving any events from that line at all.
The toolbar
- Search lines… — filter by name or number.
- The two icons next to the search box switch between card view and table view.
- Copy, CSV, Excel — export the list of lines.
- Reload Lines — re-reads the list from the server.
- Update lines status — asks each connection for its current state.
If a line shows as disconnected but the phone is on and online, try Update lines status first: often the status on screen is simply stale.
Chapter 5
Connecting a WhatsApp number
The three-step setup.
Step 1 — the line's details
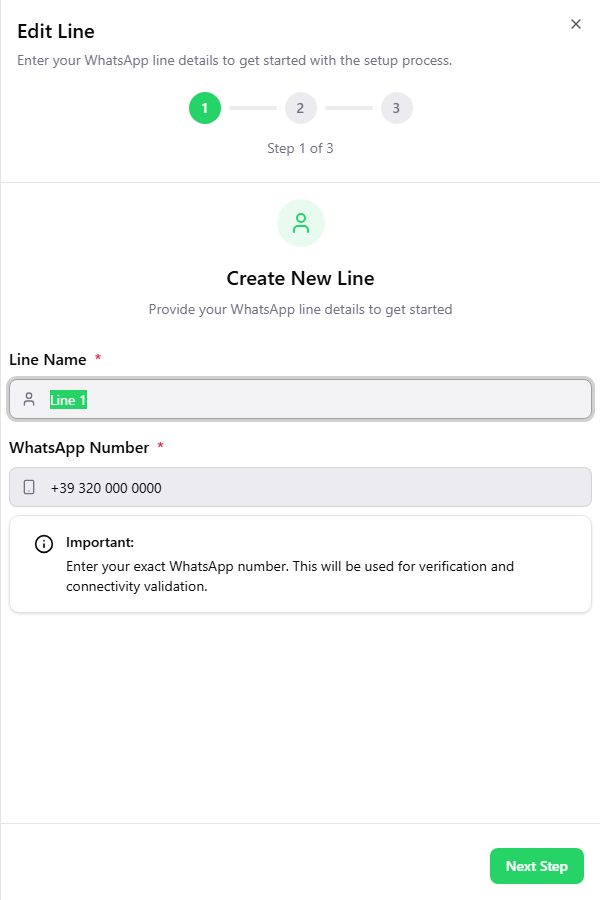
The panel is headed Create New Line, whether you are adding a number or editing one that already exists.
- Give the line a recognisable Line Name, for example "Support" or "Sales".
- Enter the WhatsApp Number with its international prefix, for example
+39320…. - Press Next Step.
The number must match exactly the one you will use to scan the QR code. If they differ, the connection is refused.
Step 2 — connecting the phone
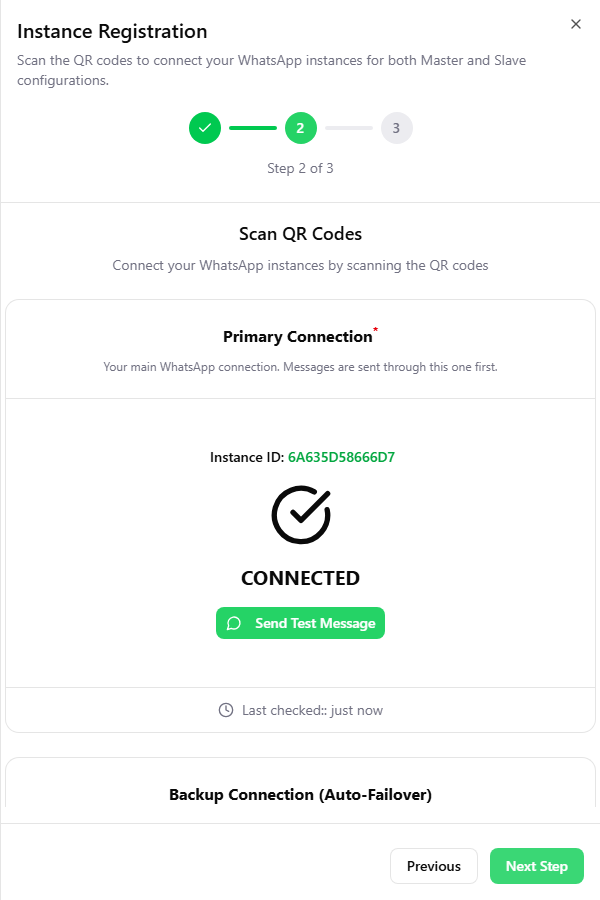
The panel is headed Instance Registration and holds two blocks.
- Primary Connection — required. This is what messages are sent through.
- Backup Connection (Auto-Failover) — optional. If the primary drops, sending moves here automatically and messages keep going out.
How to scan the code
- Press Load QR Code.
- On your phone open WhatsApp and go to Settings → Linked Devices → Link a Device.
- Scan the code shown on screen.
- When the status turns CONNECTED, press Send Test Message for a final confirmation.
The QR code expires within seconds — that is a WhatsApp security measure, not a fault. If it fades, press again for a fresh one. QR requests are rate-limited, so avoid pressing repeatedly.
Step 3 — the settings
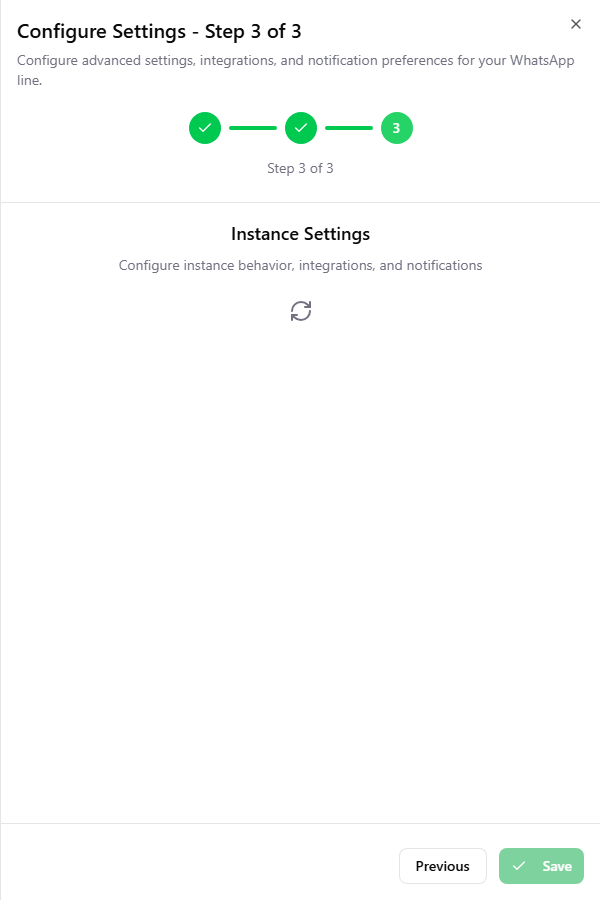
The last step is headed Instance Settings and gathers four panels — General, Meta Cloud API Fallback, Migachat Integration and Line Status Notifications — described in the next two chapters. Press Save when you are done.
You can save straight away with the defaults and come back later through Edit Line. The line already works.
Chapter 6
Line settings
The General, Migachat and Notifications panels.
General
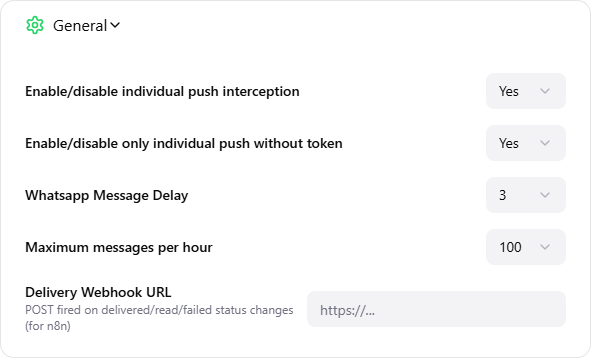
| Setting | What it does |
|---|---|
| Individual push interception | Lets the dashboard intercept notifications for individual messages. |
| Individual push without token | Accepts those notifications even when no security token arrives. |
| WhatsApp Message Delay | How many seconds to wait between messages. Higher is safer. |
| Maximum messages per hour | The hourly ceiling for this line. |
| Delivery Webhook URL | An address Migasender calls whenever a message changes state: delivered, read or failed. |
The delay and the hourly limit are your two main defences against the number being blocked. Lowering them makes sending faster and riskier: change them with care.
Migachat Integration
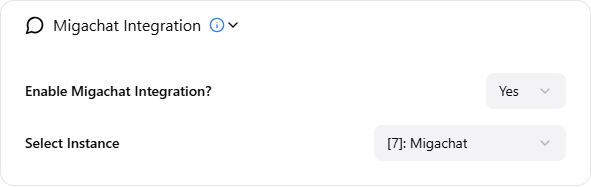
With the integration on, messages arriving on this line are handed to the AI assistant, which composes and sends the reply. Select Instance chooses which assistant to use.
The assistant only answers incoming messages. Campaigns that you start are never touched.
Line Status Notifications
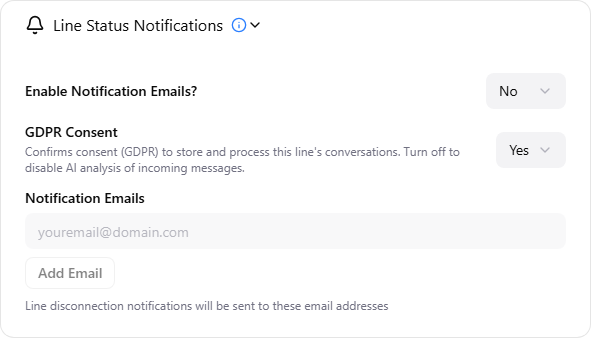
- Notification email — when on, you get an alert as soon as the line disconnects.
- GDPR Consent — authorises storing and analysing this line's conversations. Turning it off disables AI analysis of incoming messages.
- Notification Email — the list of addresses that receive the alerts. Add as many as you need with Add Email.
List at least two addresses, belonging to two different people. If the line drops on a Friday evening, that is the difference between noticing at once and noticing on Monday.
Chapter 7
Meta Cloud API Fallback
The safety net that keeps messages going out when the normal line is not enough.
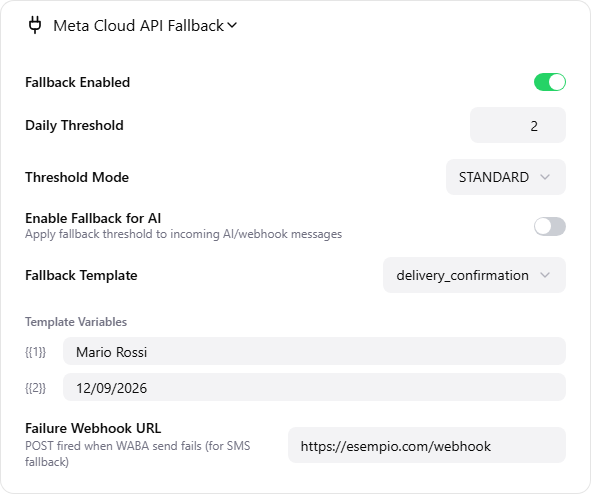
WhatsApp limits how much an ordinary number can send before it starts to look suspicious. When you pass the threshold you set here, Migasender does not stop sending: it switches to Meta's official channel, the Cloud API, which uses approved templates.
| Setting | What it does |
|---|---|
| Fallback Enabled | Turns the whole mechanism on or off. |
| Daily Threshold | After how many messages a day this line switches to the Cloud API. Minimum 1, default 40. |
| Threshold Mode | STANDARD: contacts who have written to you in the last 7 days are never switched and do not count. STRICT: every message counts, no exceptions. See "How the daily counter works" below. |
| Enable Fallback for AI | Only affects the assistant's (AI) replies: when it is on and the threshold is reached, the assistant is not called and the line's template goes out instead. API sends only need Fallback Enabled. |
| Fallback Template | The approved template to use once the Cloud API takes over. |
| Template Variables | The values that fill the template's {{1}}, {{2}}… placeholders. |
| Failure Webhook URL | Called when even the Cloud API send fails — for example to trigger an SMS. It receives event (waba_send_failed), app_id, line_id, phone, template_name, error, fallback_reason, reference (the value passed in the API call) and timestamp. It is also called when the number has no WhatsApp account: nothing is sent, fallback_reason is number_not_on_whatsapp and template_name is empty. The send also shows on the Logs page as failed. |
The fallback only works if you already have at least one Meta-approved template and the WABA configuration filled in. See chapter 13.
How the daily counter works
- The threshold is counted per line, not per contact. Only the messages that go through the threshold check add one: the fallback must be active for that message (Fallback Enabled on the line, or a fallback template in the API call), and in
STANDARDmode a contact who wrote in the last 7 days is skipped and not counted. - The counter goes back to zero every day at 00:00 UTC (01:00 in Italy in winter, 02:00 in summer).
- As long as the counter is below the threshold, messages go through the line as usual. From the threshold onward, they go through the Cloud API as a template.
- The master and slave sides of a line each keep their own counter.
| Mode | Who is counted | When to use it |
|---|---|---|
STANDARD | Only contacts who have not written to you in the last 7 days (today excluded). An active contact always gets the normal message and does not add to the counter. | The usual choice: people already talking to you keep getting ordinary messages. |
STRICT | Every message, to anyone. | When the line must never go past the threshold, for example a new or fragile number. |
A different template for each message
The template set on this panel is the same for every message. A system that sends through the API (an order-ready notice, a birthday, a reminder…) can instead send, with each message, the template that fits it. If that message ends up in the fallback, Migasender uses the template from the call instead of the line's one. The parameters are listed in the API documentation, under fallback_template_name.
A message that carries its own template:
- is switched at the threshold even when Fallback Enabled is off on the line;
- is also switched when the line cannot send: the line does not exist, is not connected, or the send is refused (for example a disconnected or banned number). Without a template in the call, these cases return an error as before.
If the line does not answer in time, the message is not resent through the Cloud API, because it may already have been delivered and the customer would receive it twice.
To find out whether it went out, send your own reference with the message and, before retrying, ask api_send/status with it: the answer is sent, not_sent or unknown. How long to wait before not_sent is set per send with not_sent_after (default 3 minutes). Details in the API reference.
Messages sent through the Cloud API appear in the History with cloud_api in the Sent Via column, so you always know which channel each send used. Their delivery statuses reach the line's delivery webhook, like those of every other message.
Chapter 8
Chat
Answering customer conversations from the dashboard.
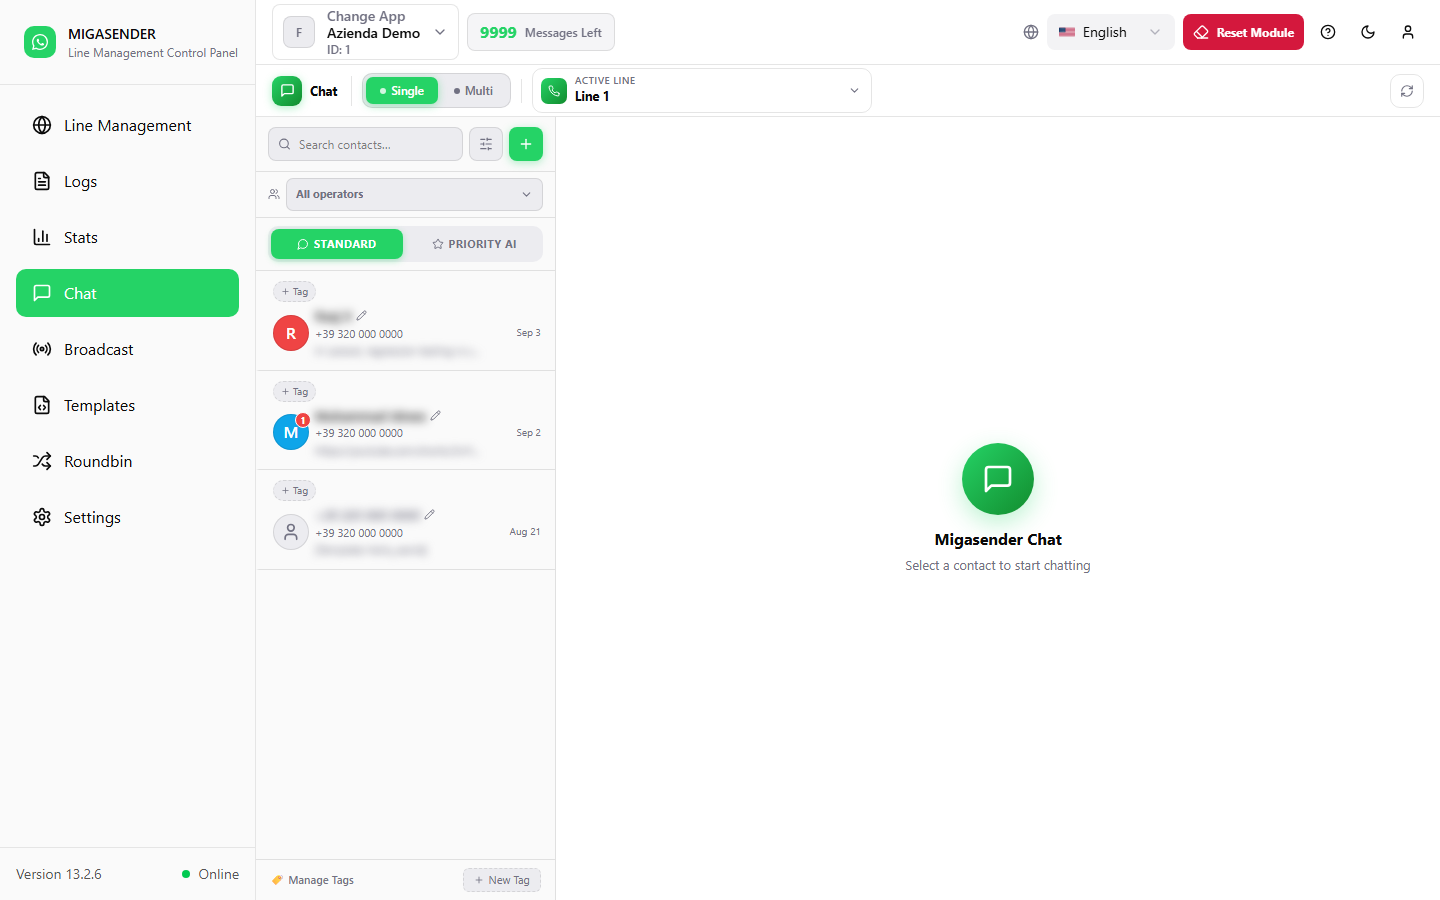
Conversations on the left, the open one on the right. At the top you pick the Active Line, that is the number you reply from.
The tools in the left column
- Single / Multi — show conversations for one line only, or all of them together.
- Filter contacts and search — to find a conversation again.
- All operators — filter by whoever is handling the conversation.
- STANDARD / AI PRIORITY — changes how the list is ordered.
- Manage Tags — create coloured labels ("VIP", "Call back") and assign them to contacts.
Writing and attaching
You can send text, images, documents and voice notes. WhatsApp formatting works: *bold*, _italic_, ~strike~.
If a customer has not written to you for more than 24 hours, WhatsApp no longer allows a free-text message: you need an approved template. See chapter 13.
The ticks next to a message tell you how far it got: sent, delivered, read. If it stays without ticks for a long time, check the line's status in chapter 4.
Messages sent through the API
Messages your system sends through the API (api_send/message) also appear in the conversation: those sent from a line and the Cloud API templates. So when the customer replies, you can see which message they are answering. The ticks update like on every other message.
Line messages sent through the API before 7 October 2026 are only in the Logs (chapter 15). For an image or a file sent through the API, the Chat shows its caption, or [image] / [file] when there is none.
When a line is disconnected
A disconnected line stays in the Active Line list, marked Disconnected in red. You can still open it and read its conversations, including the replies that arrive on the Cloud API during the outage.
Writing is disabled on that line until it is reconnected (chapter 5). In Multi mode, pick a connected line to reply from. When the Chat opens, it starts on the first connected line.
Chapter 9
Broadcast — sending
Sending the same message to a group of contacts.
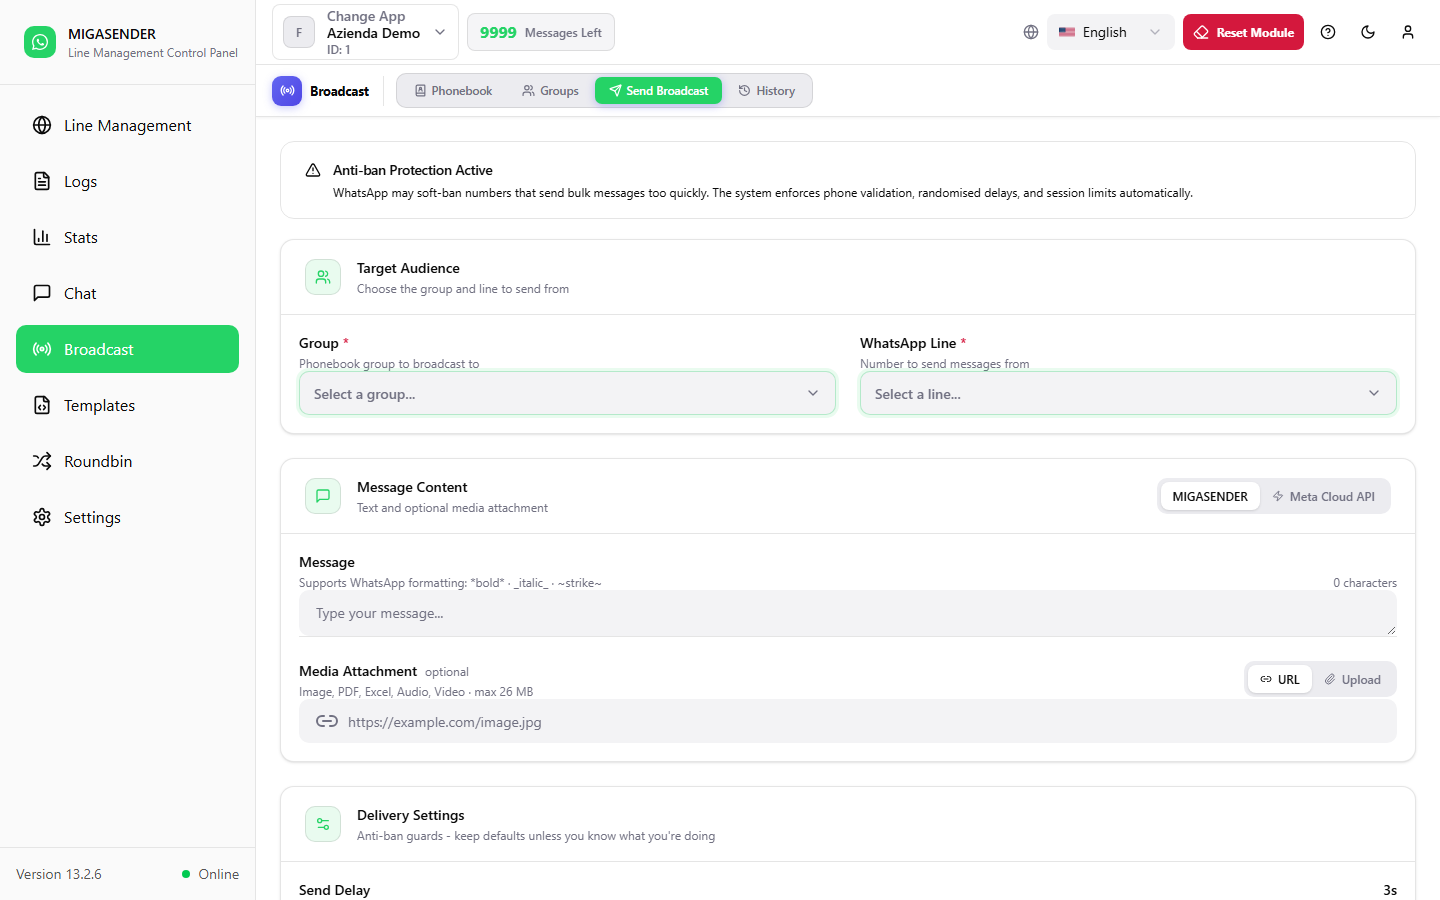
Preparing a send
- Target Audience — choose the Group of recipients and the WhatsApp Line to send from.
- Message Content — write the text. The switch at the top right picks the channel: MIGASENDER (the ordinary line) or Meta Cloud API (approved templates).
- Media Attachment — optional: image, PDF, Excel, audio or video, up to 26 MB, by URL or upload.
- Delivery Settings — the delay between messages. Leave the defaults unless you have a specific reason.
- Start the send and follow it in the History (chapter 12).
The Anti-ban Protection banner at the top of the page is not decoration. WhatsApp blocks numbers that send in bulk too quickly, and a blocked number cannot be recovered from the dashboard. Do not set the send delay to zero.
Before a real campaign, make a group with two or three of your own numbers and do a dry run. You will see the message exactly as the customer will.
Chapter 10
Broadcast — Phonebook
The list of contacts you can write to.
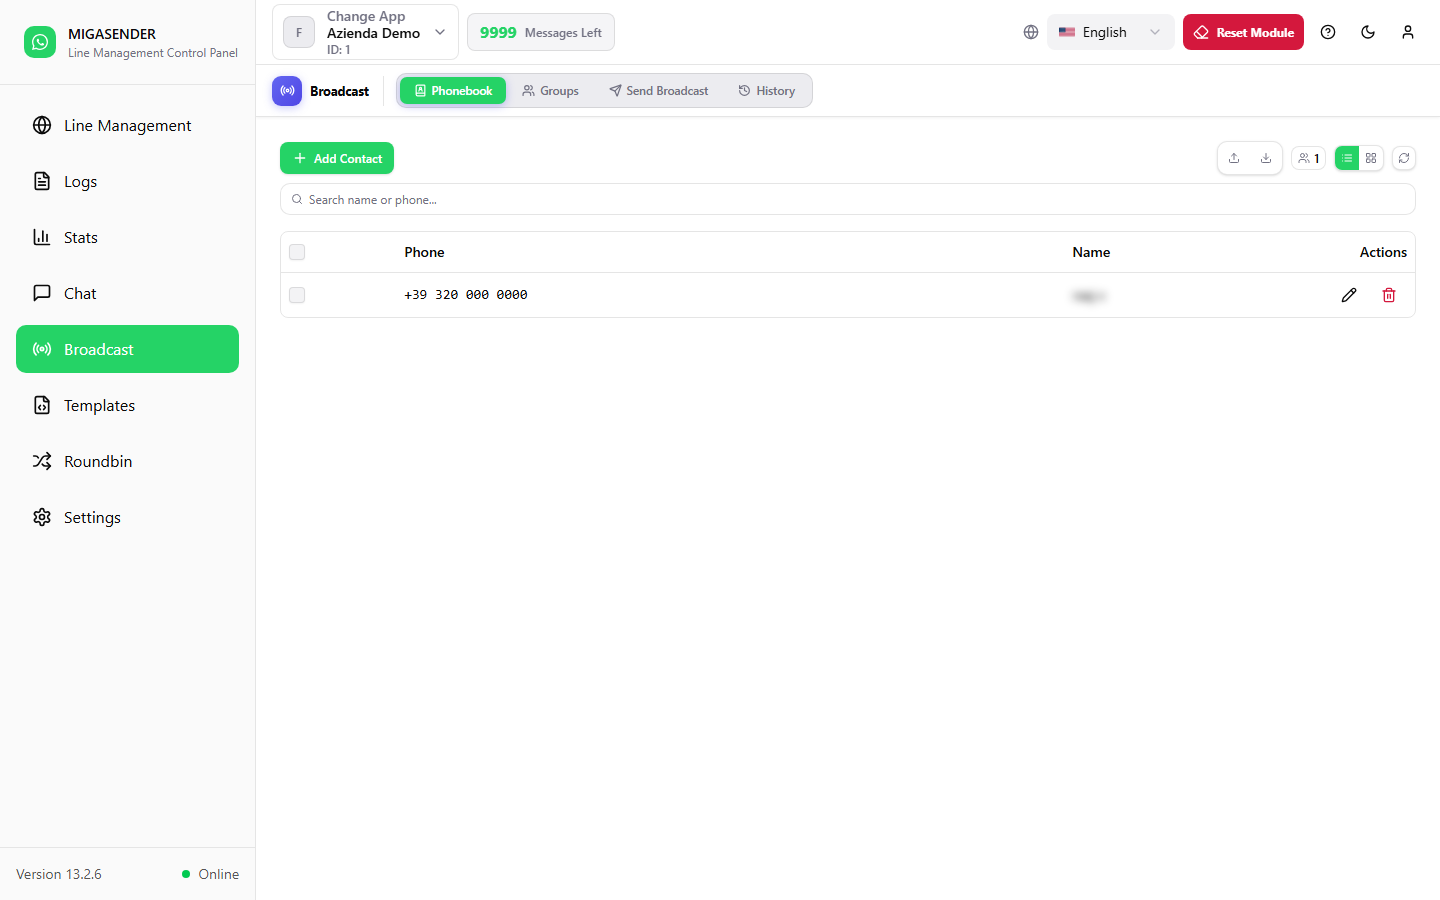
Adding a contact
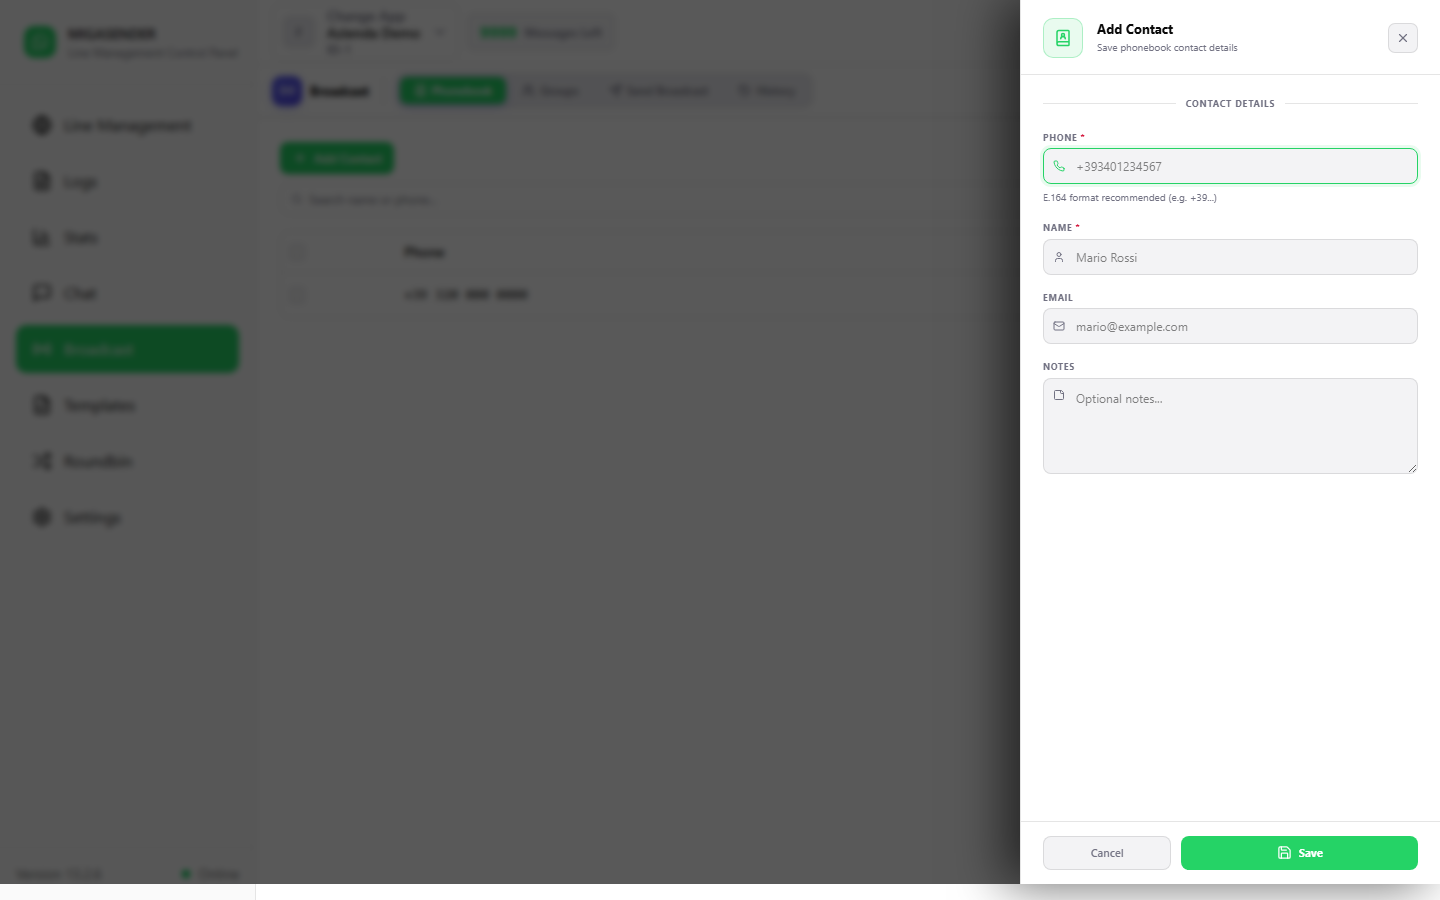
- Press Add Contact.
- Fill in at least the phone number, with its international prefix. Name, email and notes are optional.
- Save.
Importing and exporting
Import CSV loads many contacts at once. The file needs the columns phone, name, email, notes. Before anything is written, the dashboard shows a preview of how many rows are valid and which are duplicates.
Export CSV downloads the phonebook, which is useful as a backup.
Duplicate numbers are not added twice: the dashboard flags them in the preview and skips them.
Chapter 11
Broadcast — Groups
Sets of contacts to use as the recipients of a campaign.
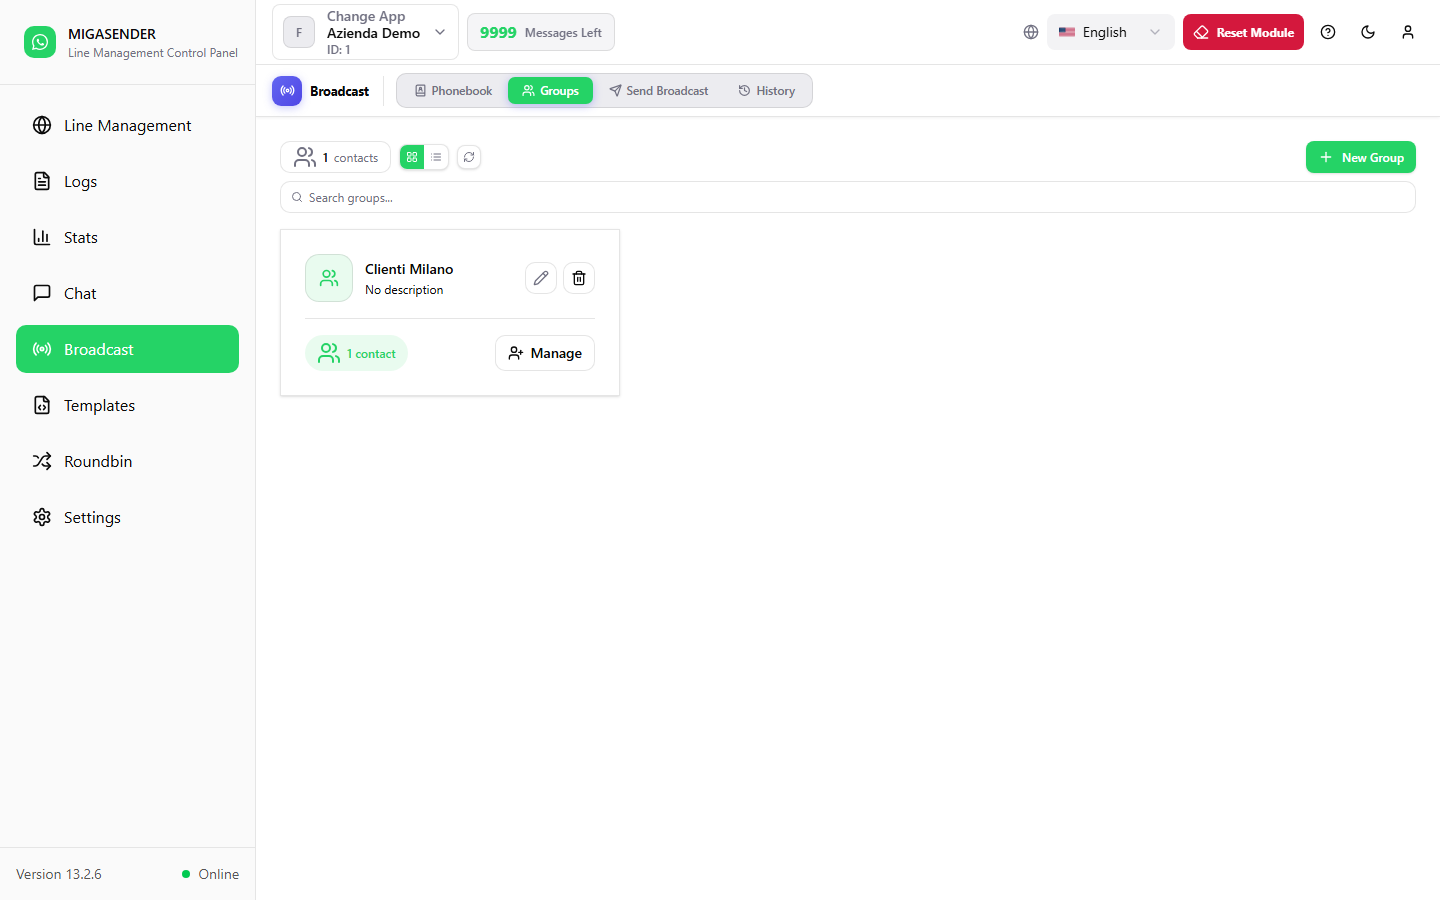
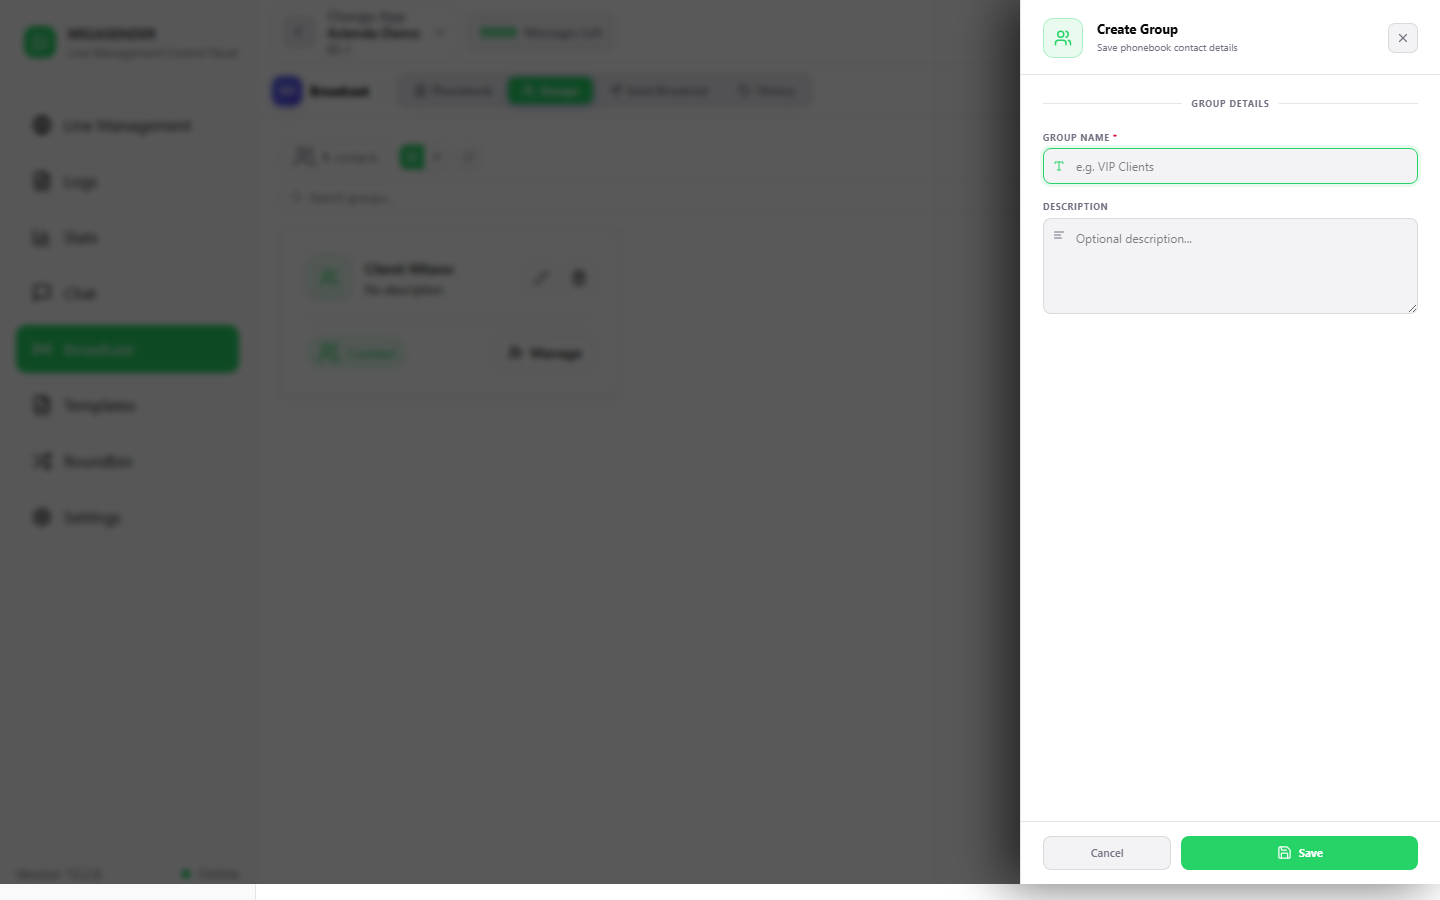
- Press New Group and give it a name, with a description if that helps.
- Open the group and add contacts from the phonebook; you can select them in bulk.
- The group then appears among the recipients in the Send Broadcast tab.
Deleting a group does not delete the contacts: they stay in the phonebook and in any other groups.
Chapter 12
Broadcast — History
What happened to every campaign, contact by contact.
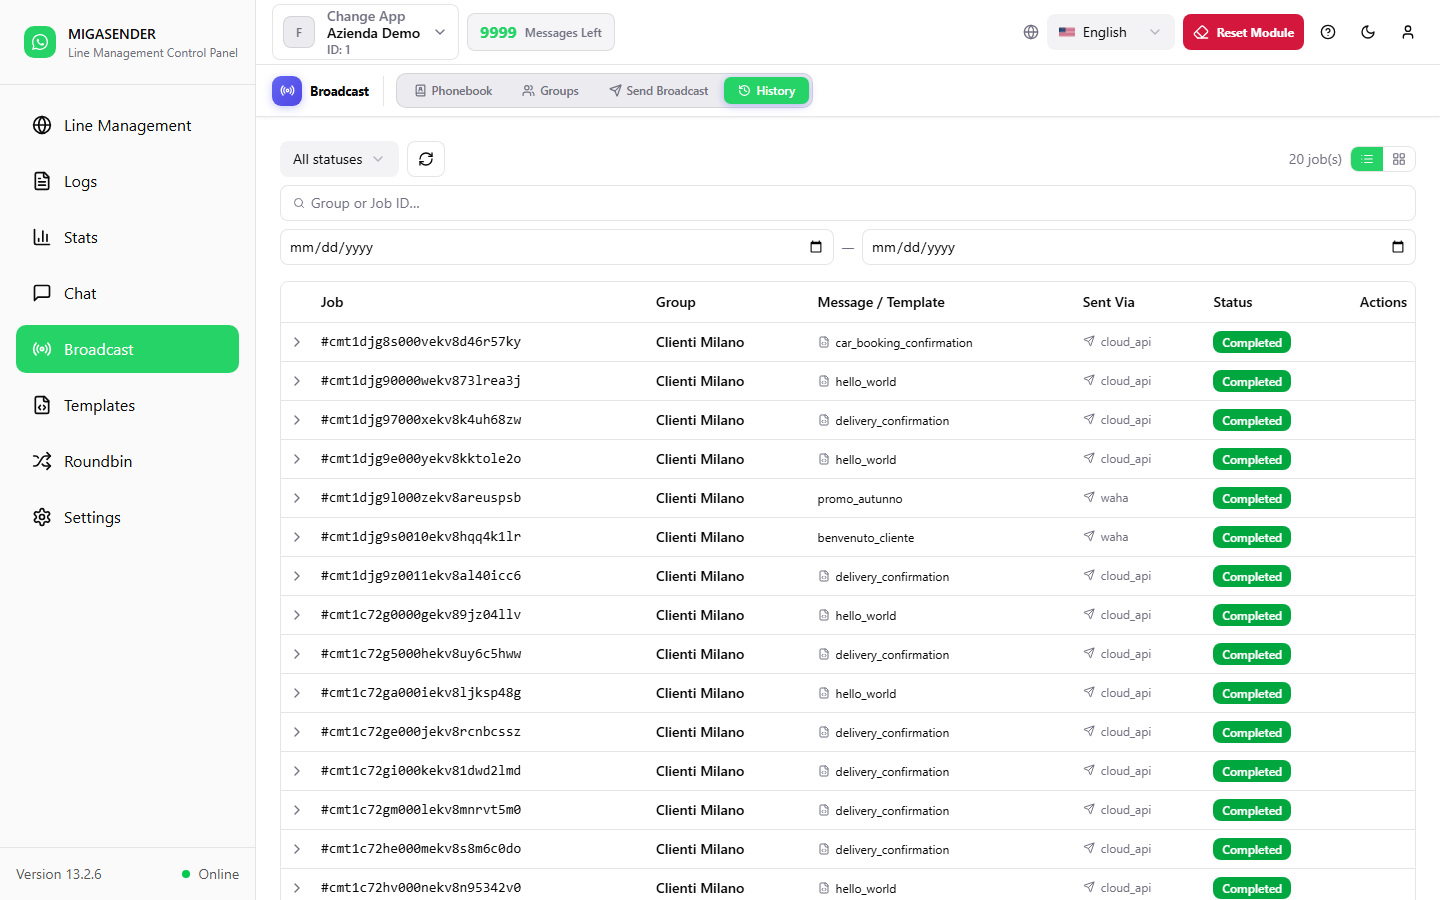
| Column | Meaning |
|---|---|
| Job | The campaign's identifier. |
| Group | The recipients. |
| Message / Template | The text sent, or the template's name. |
| Sent Via | Migasender = the ordinary line; Cloud API = Meta's official channel. |
| Status | Pending, running, completed, failed or cancelled. |
| Progress | How far the send has got. |
| Sent / Failed / Skipped | The count of the three possible outcomes. |
The contact-by-contact detail
Click a row to open it: the outcome for every single recipient appears underneath. The detail lists Phone, Name, Status, Error and Sent at. This is the right place to find out why a customer did not receive the message.
An interrupted campaign can be resumed with Retry. Contacts already reached are not messaged again.
Chapter 13
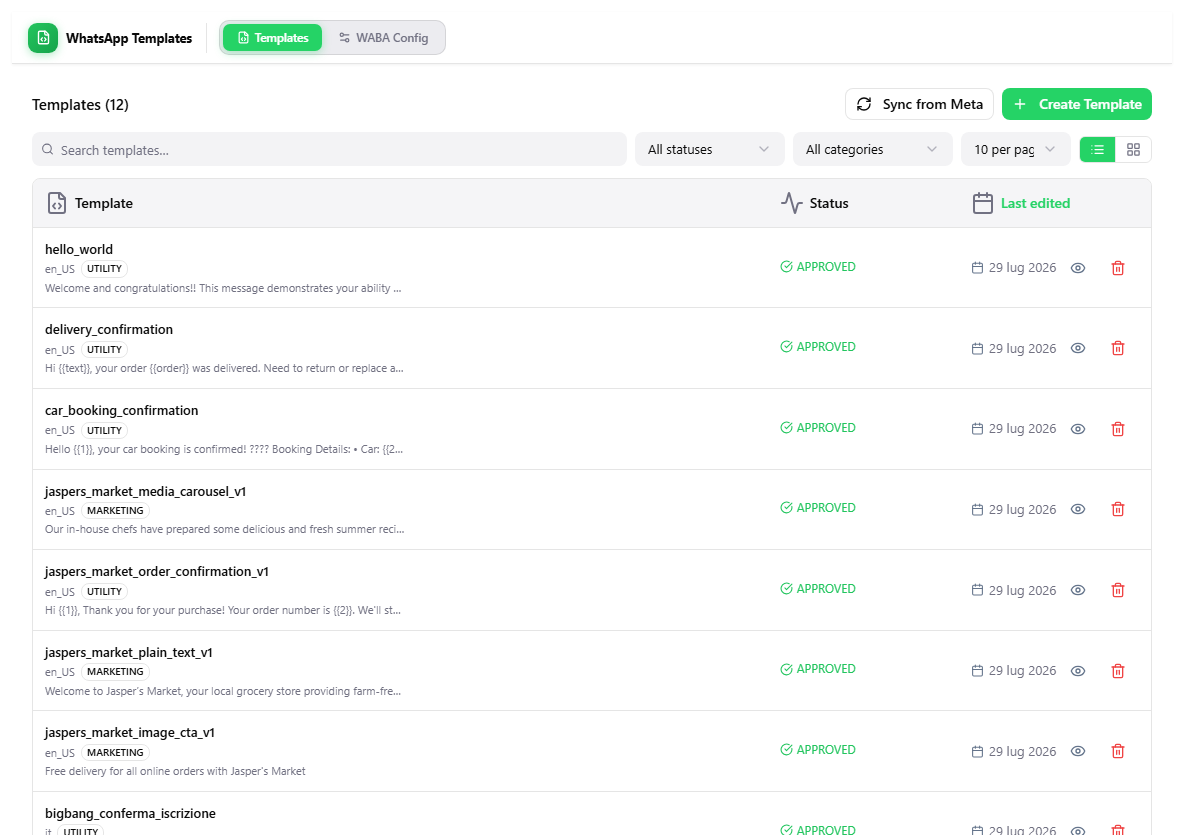
Templates and WABA Config
Messages pre-approved by Meta, and the link to your WhatsApp Business account.
Why they exist
WhatsApp does not let you message a customer first with free text. You need a template: a message Meta has already read and approved. The same applies once more than 24 hours have passed since the customer's last message.
The statuses
| Status | Meaning |
|---|---|
| APPROVED | Approved: you can use it. |
| PENDING | Waiting for Meta's review. |
| REJECTED | Rejected: fix the wording and submit again. |
Creating and syncing
- Create Template — compose a new message, pick its language and category (
UTILITYorMARKETING) and submit it to Meta for approval. - Sync from Meta — re-reads the list and the current statuses from Meta.
- The eye icon opens a preview of the message.
Variables
The {{1}}, {{2}} placeholders are replaced at send time. A template like Hi {{1}}, your order {{2}} has shipped. becomes a different message for every recipient.
WABA Config
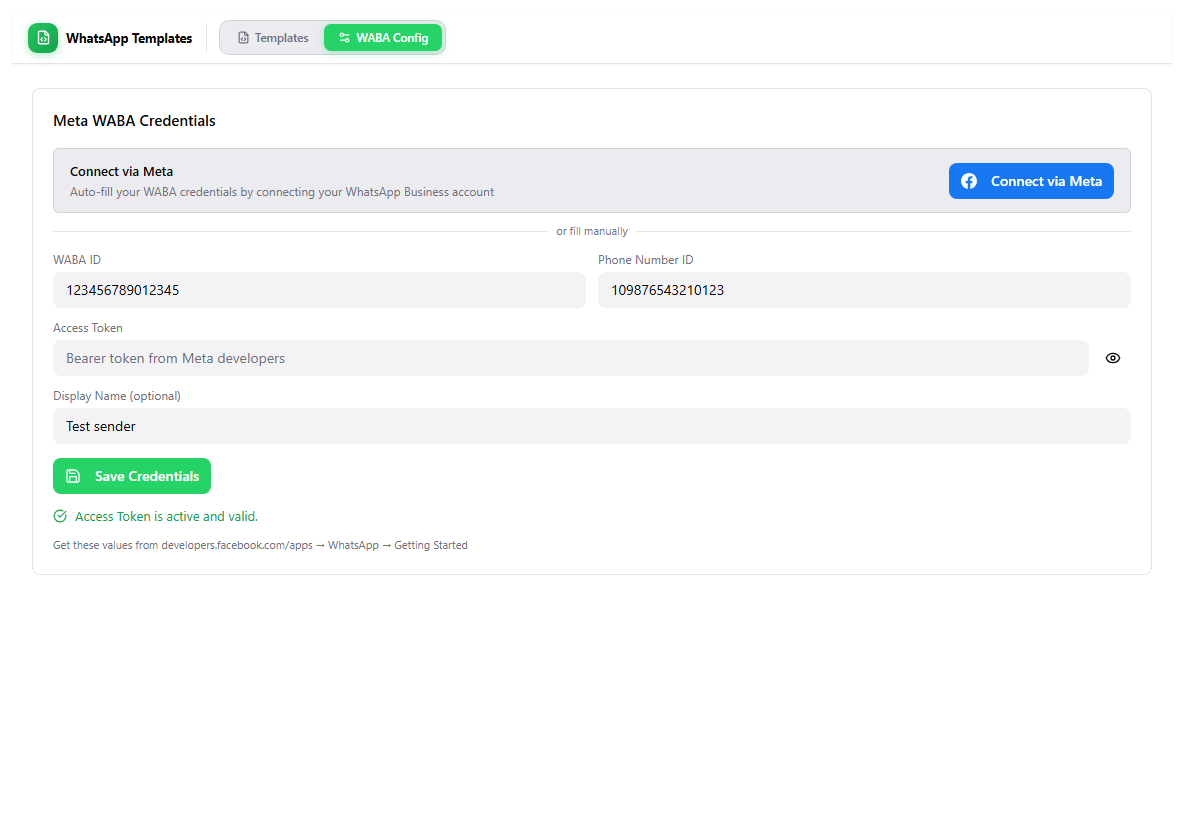
The second tab holds your Meta WhatsApp Business credentials: WABA ID, the phone number identifier and the access token. Without them neither templates nor the fallback in chapter 7 will work.
Meta's approval of a template can take anything from a few minutes to a few hours. Prepare them before the campaign, not on the day.
Chapter 14
Roundbin
Spreading sends across several lines, in turn.
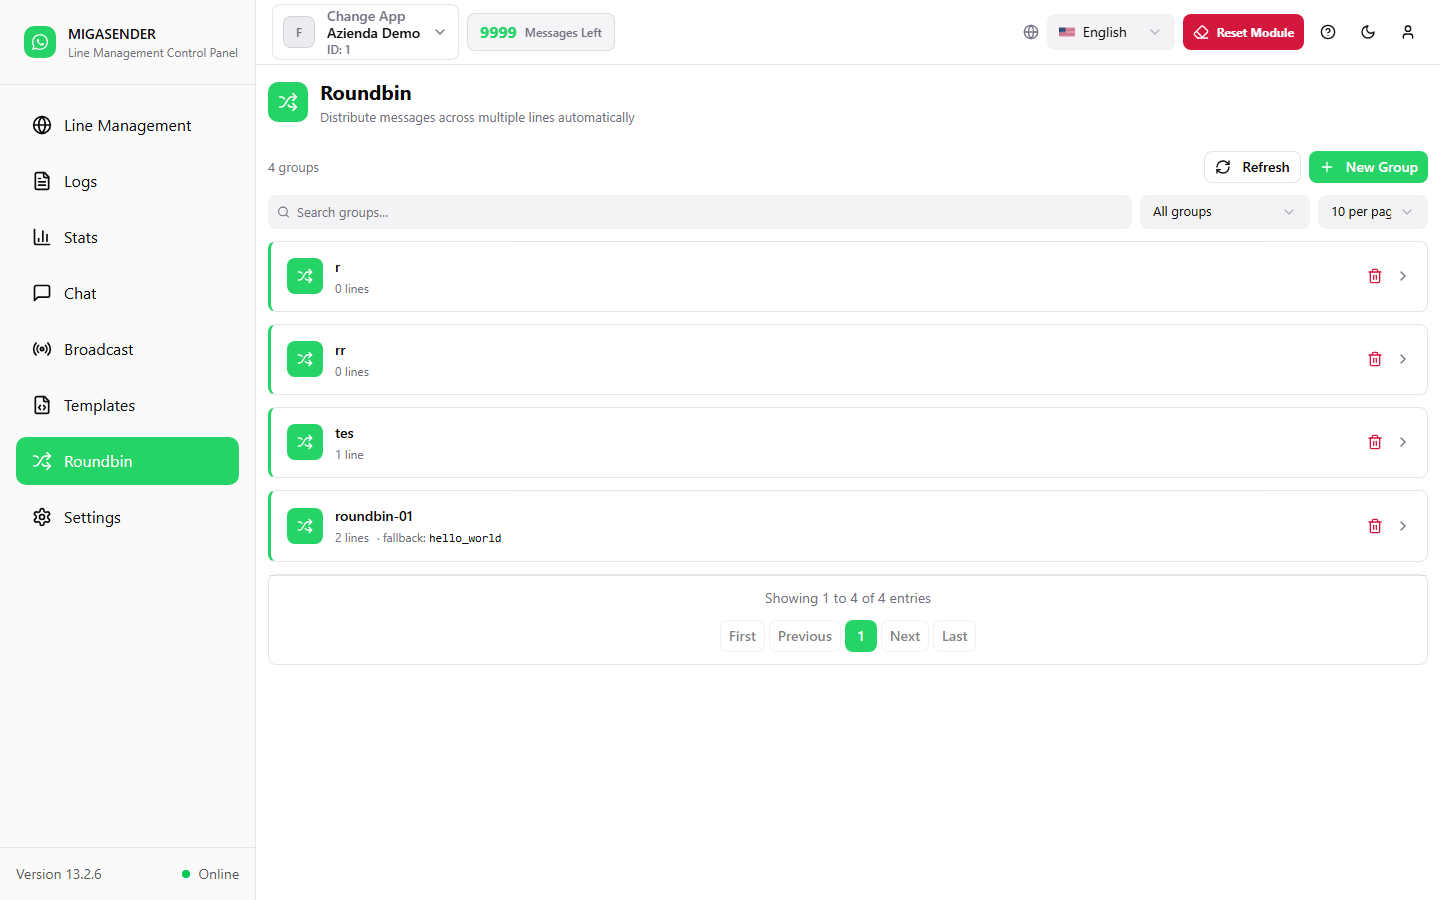
A Roundbin group pools several lines. When a message is sent to the group, the dashboard picks the next line in rotation: the load spreads out instead of falling on one number.
Creating a group
- Press New Group and give it a name.
- Add the lines that should belong to it.
- Optionally set a fallback template, used when the rotation has to move to Meta's channel.
Each row in the list shows how many lines the group holds and its fallback template, if any.
Roundbin is especially useful for sends that arrive through the API: spreading the traffic over several numbers keeps each one under its own hourly limits.
Chapter 15
Logs
The record of every message in and out.
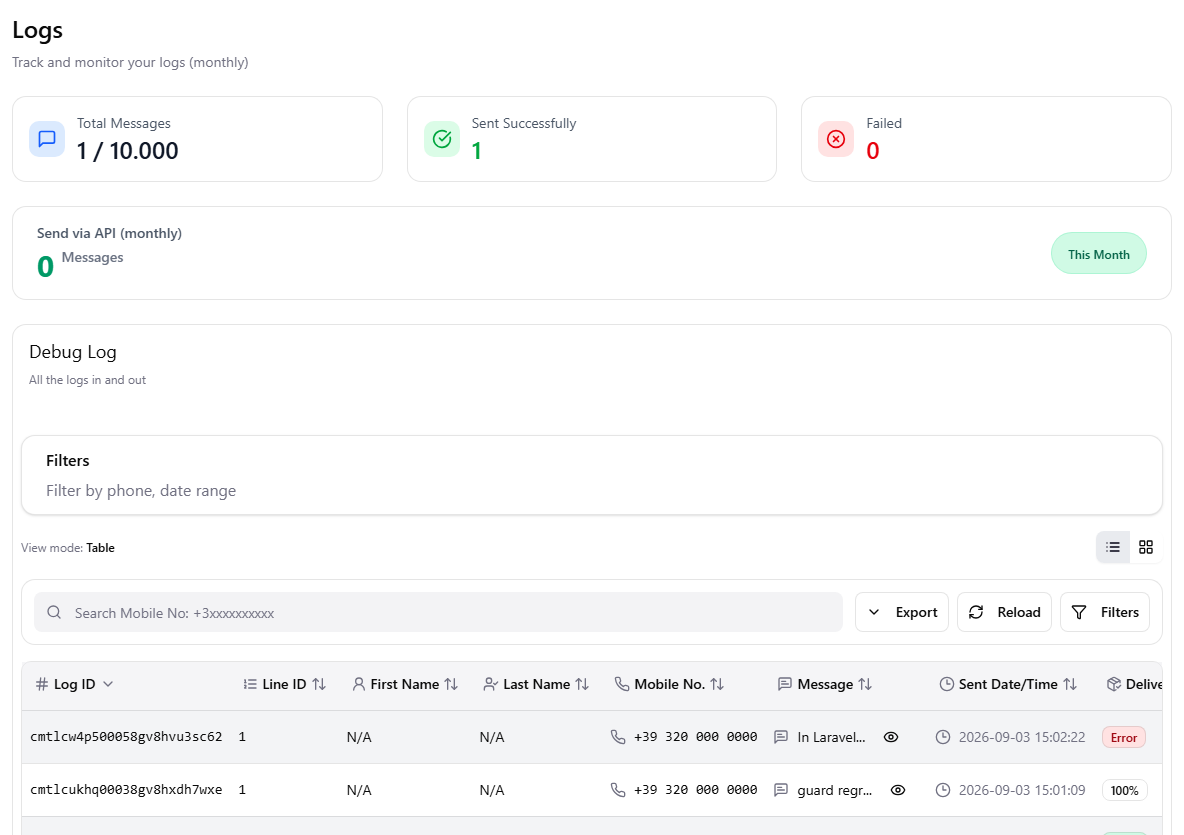
The monthly summaries
- Total Messages — how many you have used out of your plan.
- Sent Successfully — those that went through.
- Failed — those that did not.
- Sent via API — how many came from connected external systems.
The Debug Log
The table lists every message with its Log ID, Line ID, the contact's name and surname, the mobile number, a preview of the message, the sent date and time and the delivery state, shown as a percentage or as Error.
The bar above the table lets you search by number, filter by date range, switch between table and card view, reload, and export.
When a customer says "I never got anything", search their number here: you will see whether the message went out, when, and with what outcome.
Chapter 16
Stats
How much arrives, how much is read, and what voice and AI cost.
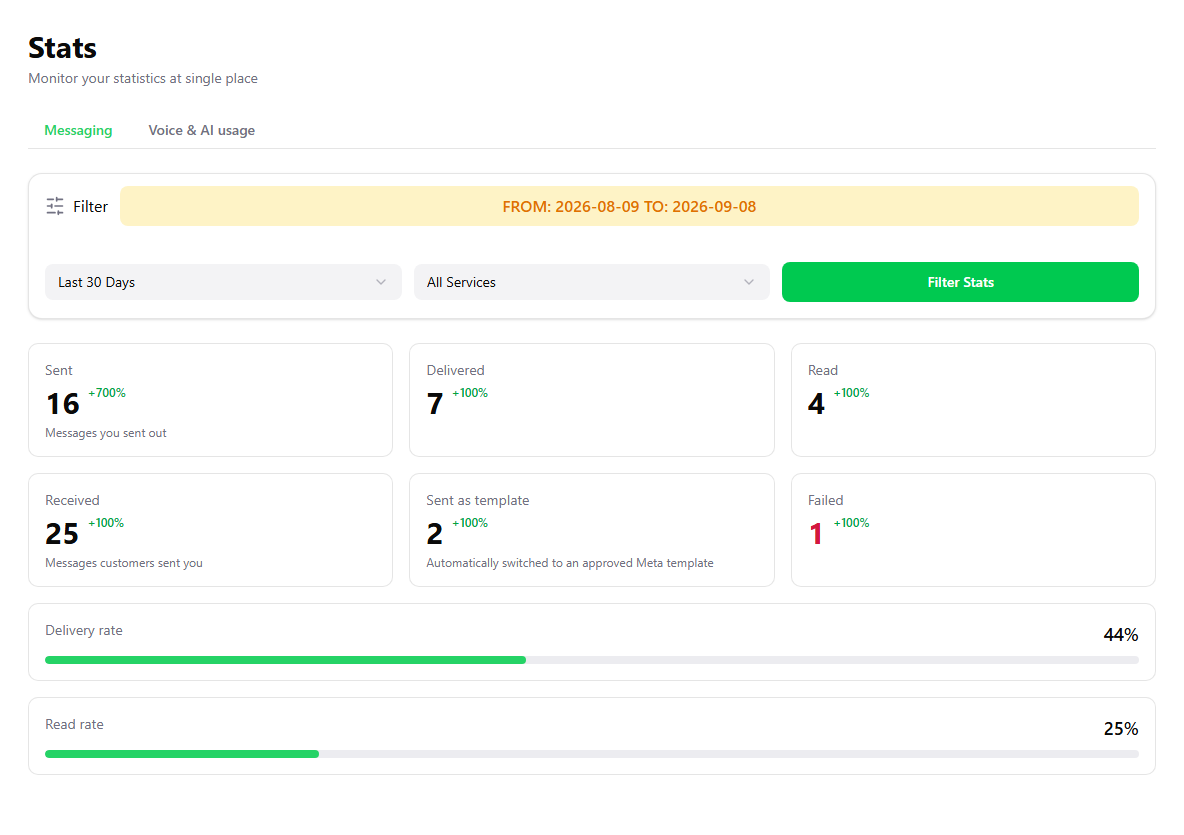
Messaging
| Card | Meaning |
|---|---|
| Sent | Messages that left the dashboard. |
| Delivered | Messages that reached the recipient's phone. |
| Read | Messages the recipient opened. |
| Received | Messages customers sent to you. |
| Sent as template | Automatically switched to an approved Meta template. |
| Failed | Not delivered. |
Below the cards, the Delivery Rate and Read Rate sum things up as percentages.
Voice & AI usage
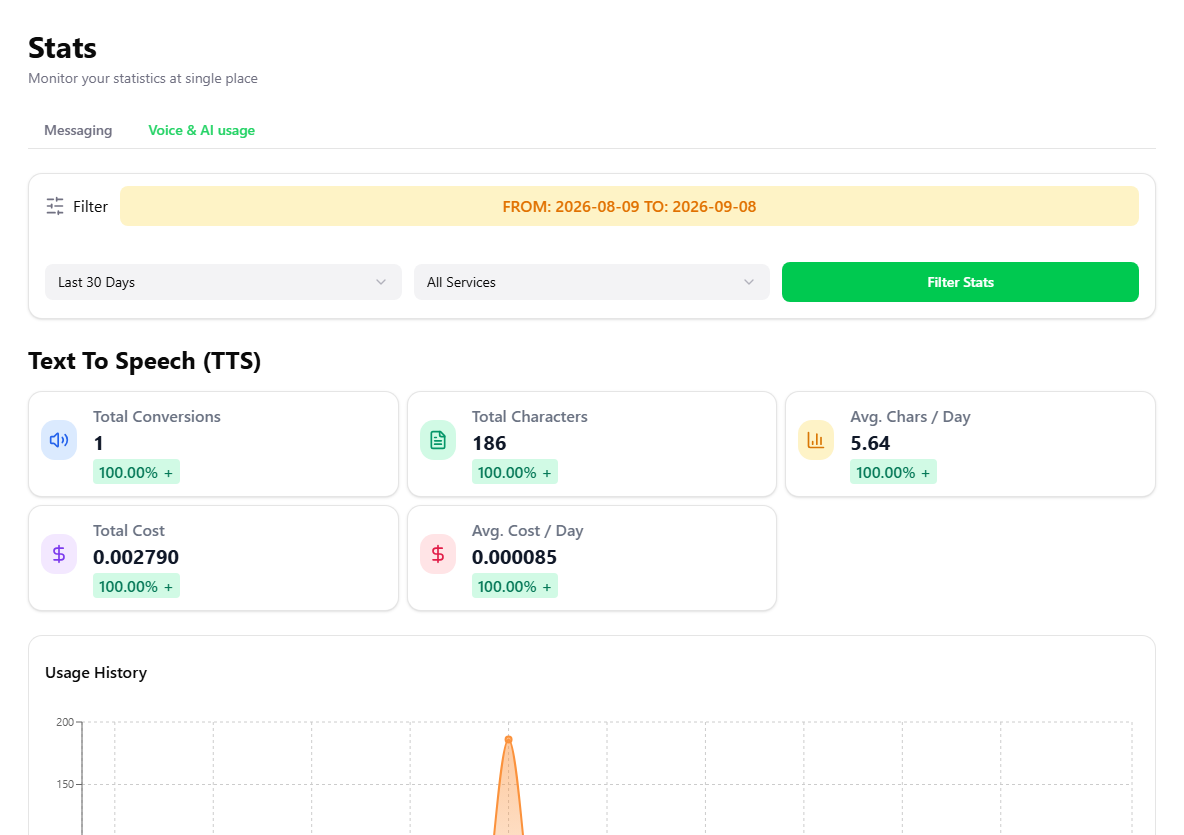
The second tab covers the voice features, and is split into two halves of the same shape.
- Text To Speech (TTS) — replies the assistant turned into a voice note.
- Speech To Text (STT) — the opposite: voice notes from customers turned into text.
Each half shows the same five figures — Total Conversions, Total Characters, Avg. Chars / Day, Total Cost and Avg. Cost / Day — then a usage chart comparing the current period against the previous one, and finally a log of every individual operation: mobile number, gateway type, service, message, cost, character count, size and any error. That log can be searched, reloaded and exported.
The filters
At the top you pick the period — for example Last 30 Days — or a custom range, and which service to include. Press Filter Stats to apply. The band above the controls always states the range currently in effect.
Delivery and read figures come from WhatsApp: if the recipient has read receipts turned off, the message will show as delivered but not read even though they saw it.
Chapter 17
Settings
Seven panels for credentials, alerts, webhooks and API access.
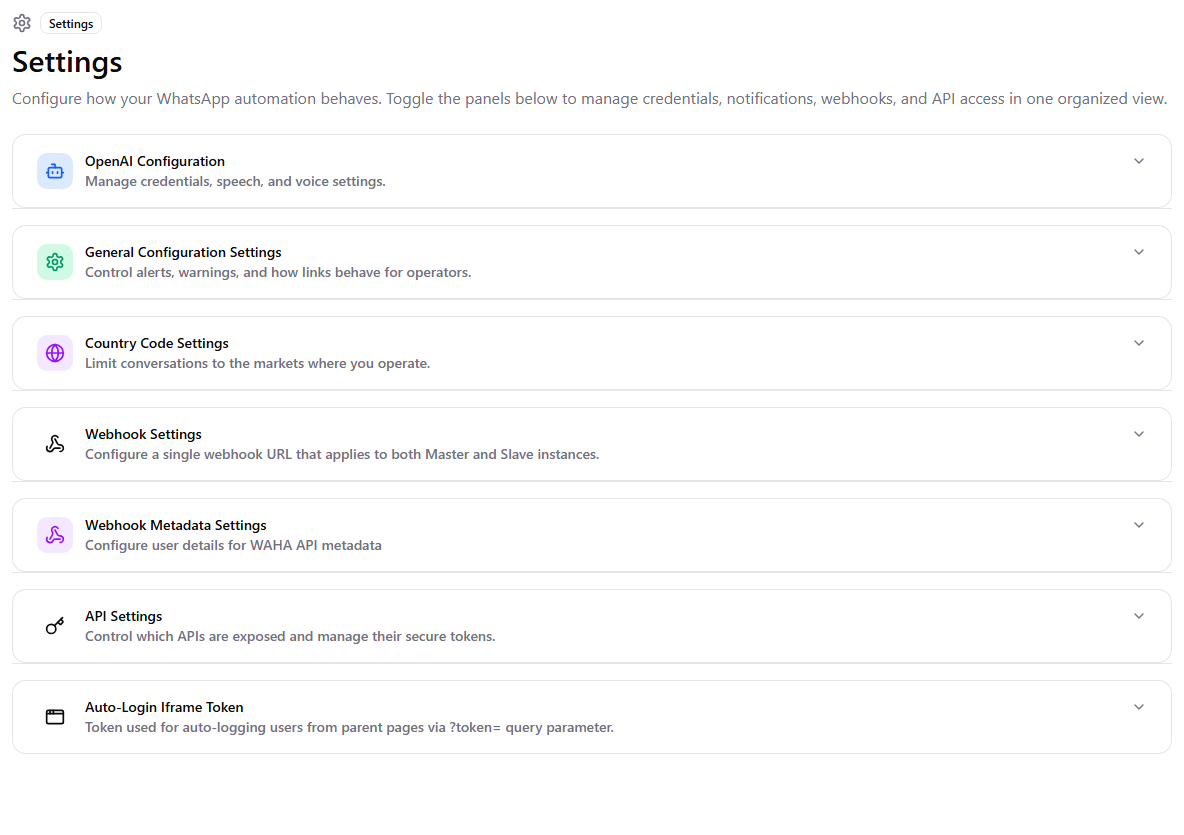
OpenAI Configuration
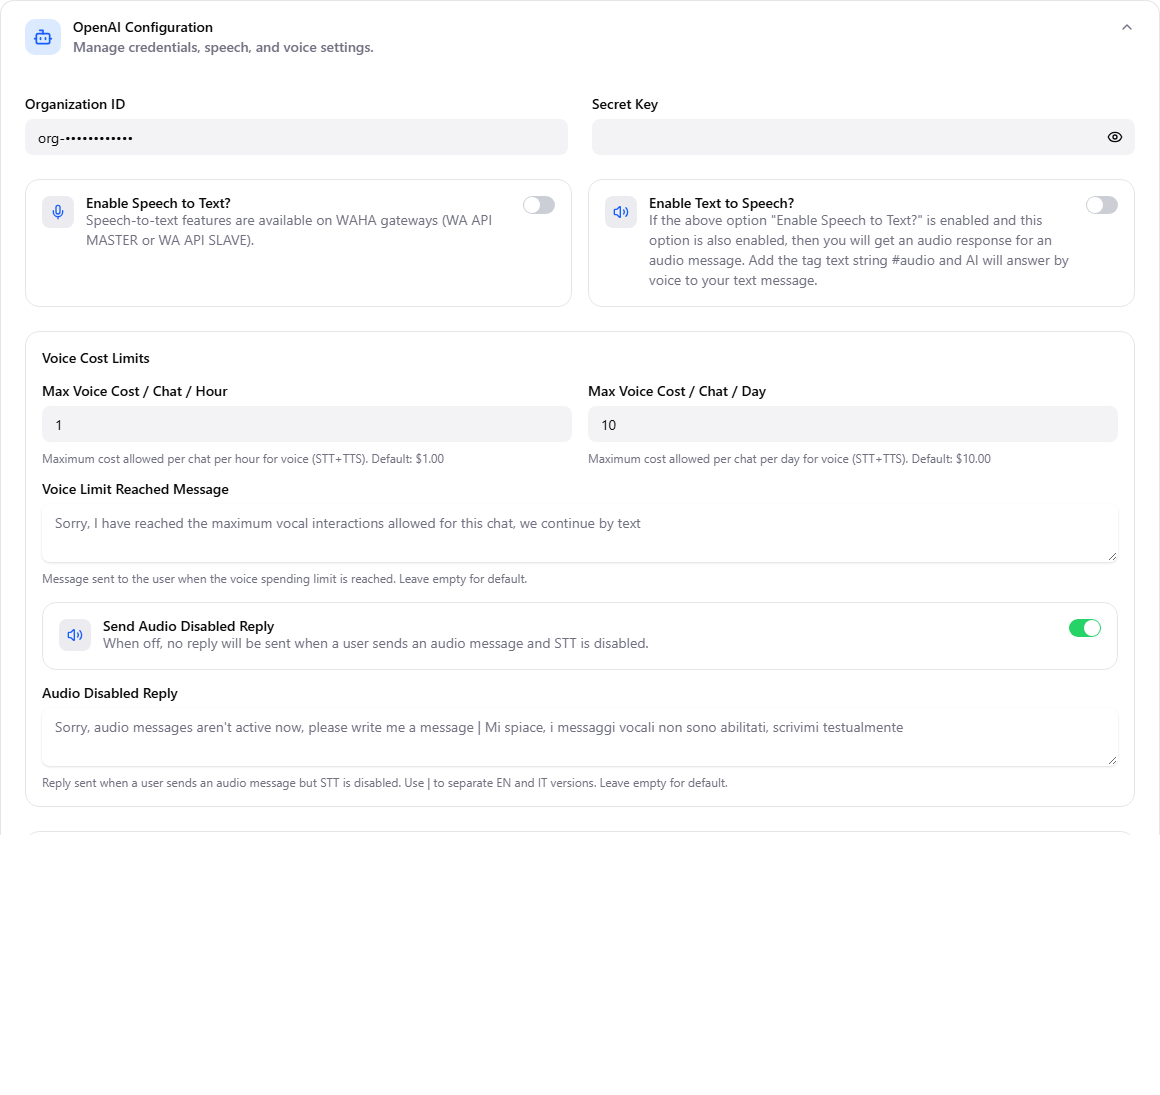
Here you enter the AI service key, choose the model and set the voice used for speech synthesis. You can pick OpenAI or ElevenLabs as the voice engine.
General Configuration Settings
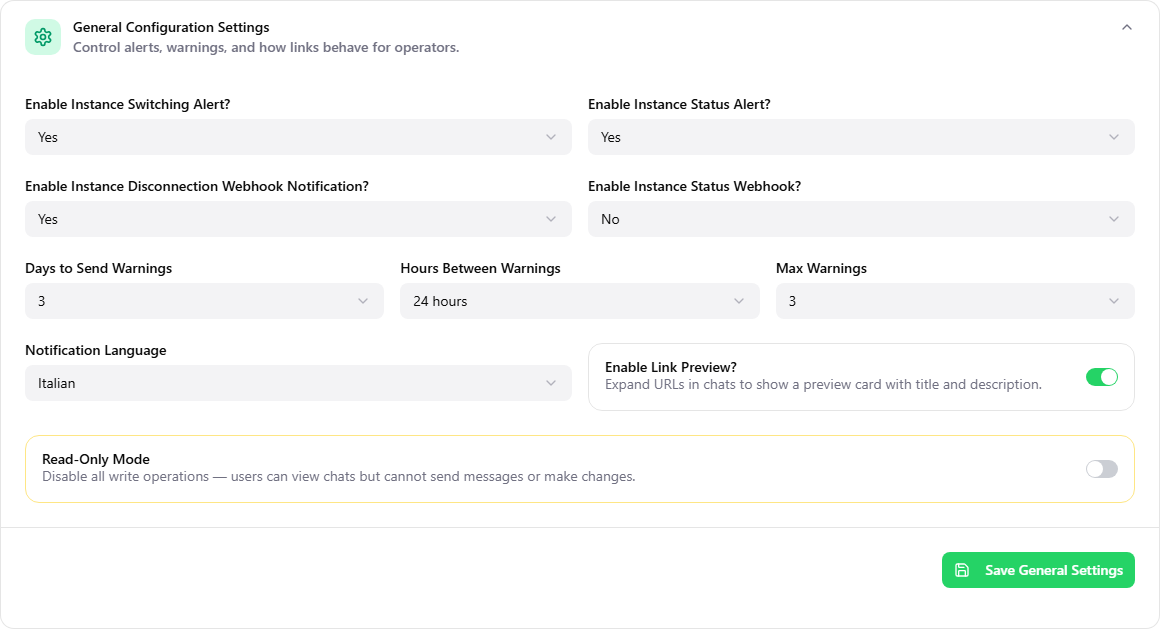
Country Code Settings
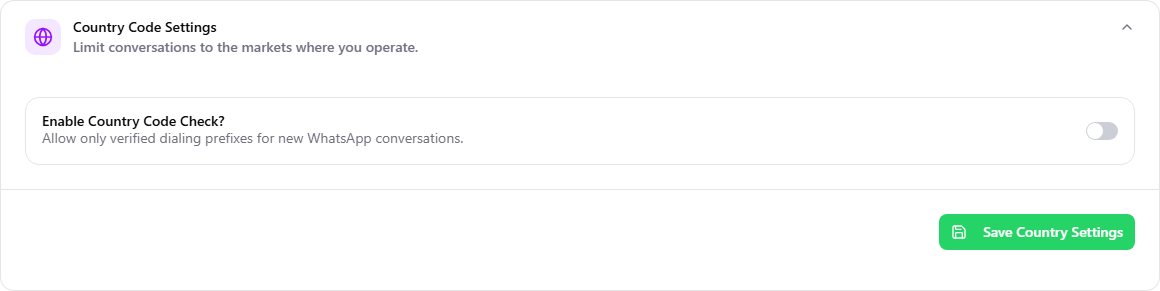
Lets you accept messages only from certain international prefixes — an effective filter against unwanted traffic.
Webhook Settings
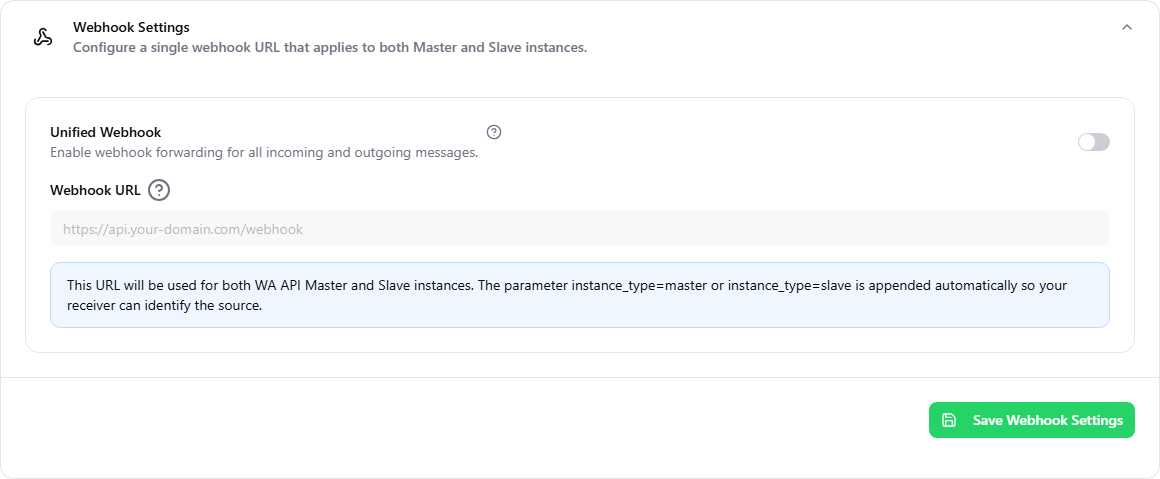
A webhook is the address Migasender calls when something happens — a message arrives, a status changes. It is how you connect the dashboard to other systems.
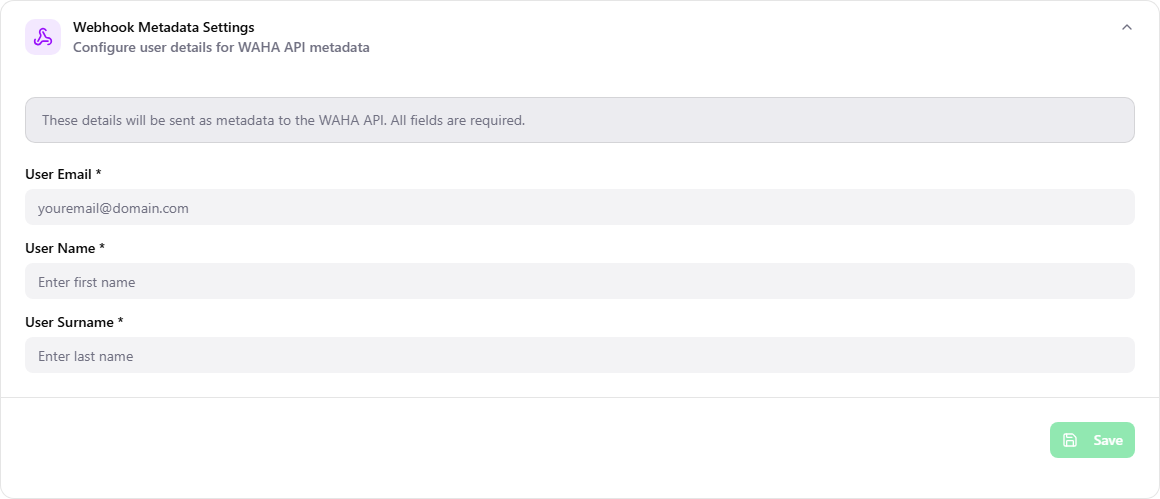
Webhook Metadata Settings
API Settings
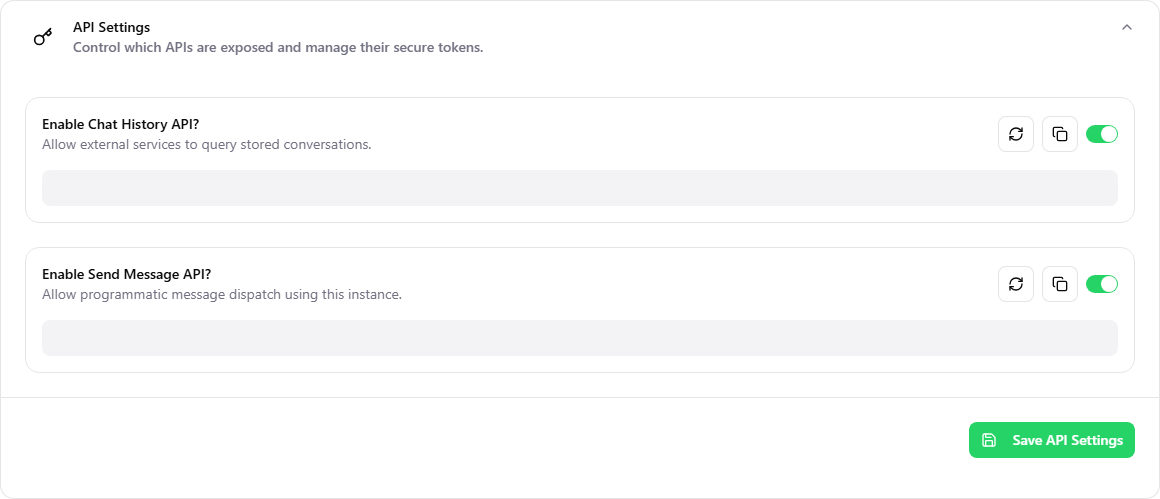
- Chat history API — lets external services read archived conversations.
- Send message API — lets external systems send messages.
Next to each switch, the two icons let you regenerate and copy the token.
An access token is as good as a password. Never put one in an email, a chat message or a shared document. If you suspect someone else has seen it, regenerate it at once: the old one stops working immediately.
Auto-Login Iframe Token
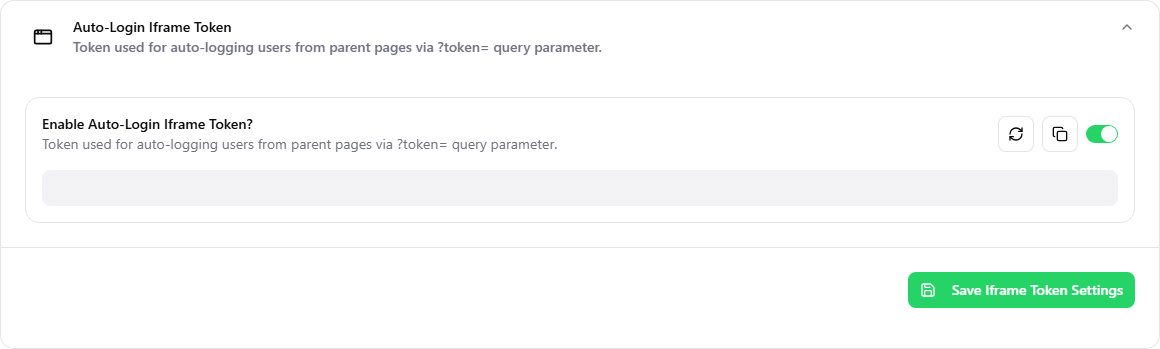
This is for when the dashboard is embedded in another site: the token passed in the address signs the user in without asking them to log in again.
Subscriptions and invoices
To view subscriptions and invoices for purchases made on MigaMATCH, open your purchases area. Enter the email address used for your purchase: you will receive a PIN by email to sign in.